ggplot2 Themes in R (Example & Gallery) | Default & Custom Options
This article explains how to use ggplot2 themes in the R programming language. The tutorial shows the different default themes that are already provided by the ggplot2 package.
Furthermore, this tutorial provides several examples to create and use a custom theme for ggplot graphs. Creating a custom theme can make it much faster to replicate complicated formatting or easier to consistently apply company brand guidelines to your graphics.
The complete table of contents of this tutorial is shown below:

Note: This article was created in collaboration with Kirby White. Kirby is an organizational effectiveness consultant and researcher, who is currently pursuing a Ph.D. at the Seattle Pacific University. You can read more about Kirby here!
Packages and Example Data
You’ll need the tidyverse package for this tutorial, which you can install with install.packages("tidyverse") and load with library(tidyverse).
We’ll create a simple figure to use throughout this tutorial, which we’ll store in an object called fig:
fig <- iris %>%
  ggplot(aes(x = Petal.Length, y = Petal.Width, color = Species)) + geom_point()
Overview
In ggplot, “themes” are the easy way to change many layout options of the graph, such as grid lines, panel borders, background colors, and more. If you plot fig + theme_***() you can use any of the nine preloaded themes to create graphs that look like this:

In addition to the preloaded themes, you can use the theme() function to modify dozens of other attributes, such as the aspect ratio of the graph, axes titles and text, legend position and formatting, captions, and more! I recommend bookmarking the RDocumentation page for the theme() function for easy reference to see more customization options beyond this tutorial.
Default Themes
Sometimes you may want to use the same pre-built theme in all your ggplot graphs without needing to call it every time. You can set the default theme with this code:
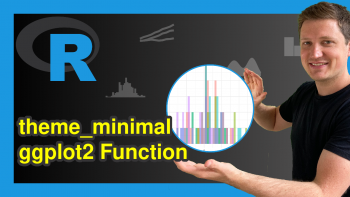
theme_set(theme_minimal())

fig

This will apply your chosen theme to all ggplot graphics during this R session.
If you still want to change a few things about theme, you can use the theme_update() function to quickly adjust the settings in your default theme. For instance, I may want to only show major grid lines in my graphs, so I’ll modify my default theme with this code:
theme_update(panel.grid.minor = element_blank())

Theme Object
Setting and modifying the default theme isn’t very useful if you frequently make changes, or are creating many graphs and want different theme options for each of them. An alternative approach is to customize and store a theme() function as an R object, which you can easily apply to your graph:
theme_object <- theme(axis.line.x = element_line(color = "purple", size = 3, linetype = "dashed"),
                      axis.line.y = element_line(color = "orange", size = 1, linetype = "dotted"),
                      legend.position = "bottom",
                      legend.title = element_text(face = "bold"))


fig + theme_object

Please note that I am aware of how terrible it looks. 🙂
You can add more elements to the object than just the theme() function. Here, we use an R object to store a base theme and modifications to it:
theme_object <- theme_classic(base_family = "serif", base_size = 15) +
                theme(panel.grid.major.x = element_line(color = "gray", size = .5, linetype = "dashed"))

fig + theme_object

Theme Function
For even more adaptability, you can create your own function to return one of multiple custom themes. This can be complex, so you should be familiar with user-defined functions before attempting this method. This method is best for when you need a complex or custom theme, but also need to be able to change it with minimal effort.
This example demonstrates how to create a custom theme that lets you quickly select one of two border options and one of four grid options:
custom_theme <- function(border = "all", grid = "none"){

  rt <- theme_get() #retrieves default theme


  # Determines border settings
  if(border == "all"){
    rt <- rt + theme(panel.border = element_rect(fill = NA, color = "black"))
  }else if(border == "none"){
    rt <- rt + theme(panel.border = element_rect(fill = NA, color = NA))
  }


  # Determines grid settings
  if(grid == "none"){
    rt <- rt + theme(panel.grid = element_blank())
  }else if(grid == "x-only"){
    rt <- rt + theme(panel.grid.major.y = element_blank(),
                     panel.grid.minor.y = element_blank())
  }else if(grid == "y-only"){
    rt <- rt + theme(panel.grid.major.x = element_blank(),
                     panel.grid.minor.x = element_blank())
  }else if(grid == "all"){
    rt <- rt + theme(panel.grid = element_line(color = "gray", size = 0.5))
  }

  return(rt)

}

fig + custom_theme()

Now that we’ve built our function, we can quickly switch between our custom settings using the borders and grid arguments we included.
fig + custom_theme(border = "none")

fig + custom_theme(border = "all", grid = "x-only")

Further Resources
On Statistics Globe, you can find several other articles on ggplot2 themes. The following list of tutorials shows how to create different kinds of graphics such as scatterplots, density plots, barcharts, boxplots, histograms, and line plots using different themes:
- theme_bw
- theme_classic
- theme_dark
- theme_economist [ggthemes Package]
- theme_gray
- theme_light
- theme_linedraw
- theme_minimal
- theme_test
- theme_void
In addition, you may have a look at the introductions to other packages that provide extra themes for ggplot2 plots:
If you are seeking general advice on how to modify the design and style of ggplot2 plots, you may have a look at the following tutorials:
- Modify Legends of ggplot2 Themes in R
- Draw ggplot2 Plot with Different Background Colors by Region
- Change Colors of Bars in ggplot2 Barchart
- Change Colors of Ranges in ggplot2 Heatmap
- Modify Major & Minor Grid Lines of ggplot2 Plot
- Change Color of ggplot2 Facet Label Background & Text
- ggplot2 Plot with Transparent Background in R
- Change Background Color of ggplot2 Plot
- Remove Grid, Background Color, Top & Right Borders from ggplot2 Plot
- ggplot2 Graphics in R
Video, Further Resources ggplot2 Package
Would you like to learn more about the ggplot2 package and its variety of functions, then please check out the video below, where you get a detailed introduction to the package and data visualization in R.

I’m Joachim Schork. On this website, I provide statistics tutorials as well as code in Python and R programming.
Statistics Globe Newsletter
Get regular updates on the latest tutorials, offers & news at Statistics Globe. I hate spam & you may opt out anytime: Privacy Policy.