How to Create a Data Frame in R (5 Examples)
In this R programming tutorial you’ll learn different ways on how to make a new data frame from scratch.
The tutorial consists of the following content:
Here’s the step-by-step process.
Example 1: Create Data Frame from Vectors
In this example, I’ll demonstrate how to create a new data frame based on vectors.
For this example, we first have to initialize some example vectors:
vec1 <- 1:6                                        # Create first vector
vec1                                               # Print first vector
# [1] 1 2 3 4 5 6
vec2 <- letters[1:6]                               # Create second vector
vec2                                               # Print second vector
# [1] "a" "b" "c" "d" "e" "f"
vec3 <- c(4, 1, 4, 6, 7, 6)                        # Create third vector
vec3                                               # Print third vector
# [1] 4 1 4 6 7 6
As you can see based on the previous R programming syntax, we have constructed three different vectors called vec1, vec2, and vec3.
We can now use the data.frame function to combine all these vector objects in a single data frame:
data1 <- data.frame(vec1, vec2, vec3)              # Join vectors in data frame
data1                                              # Print data frame
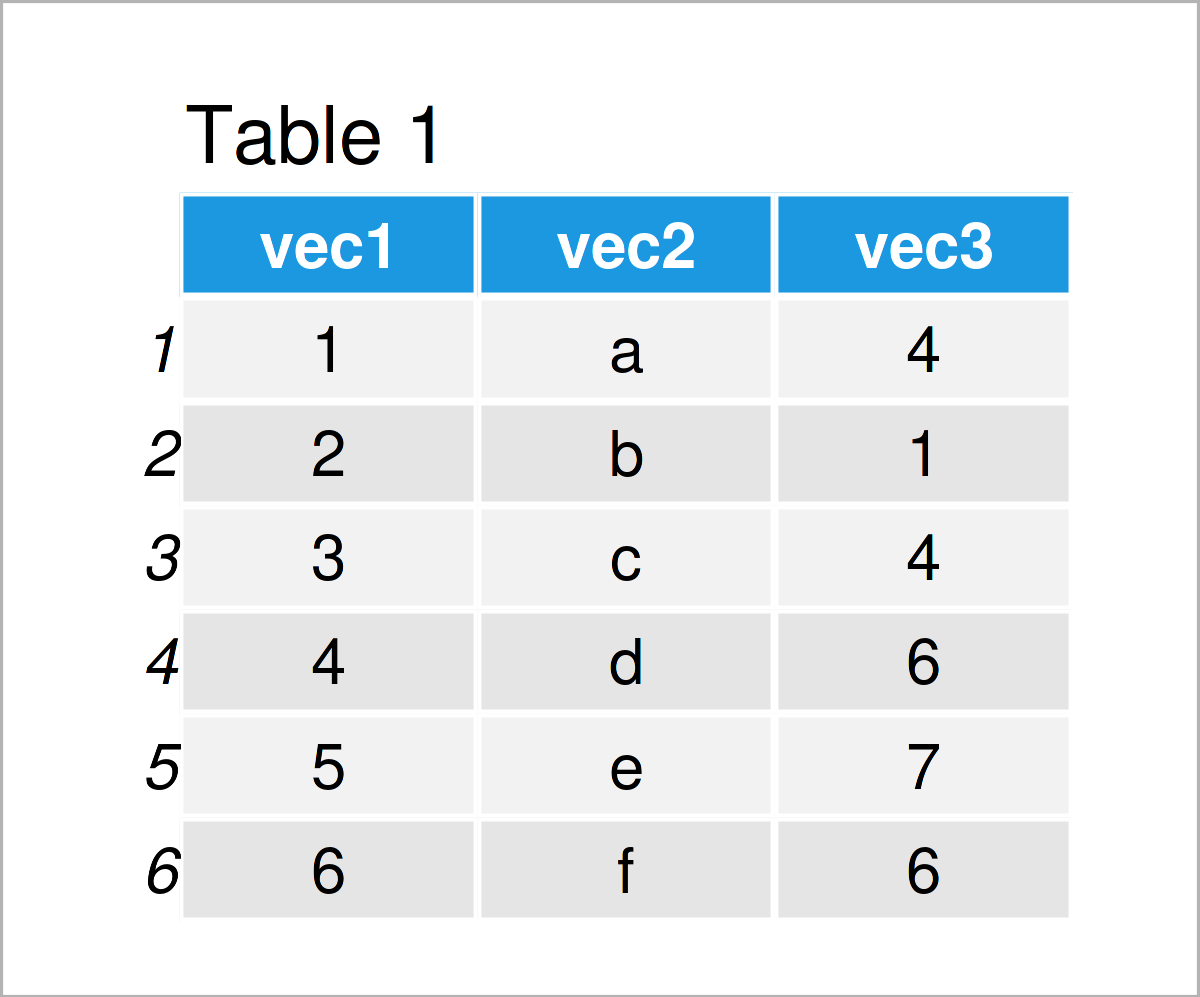
In Table 1 it is shown that we have created a new data frame called data1 that contains our three input vectors.
Example 2: Create Data Frame with Values from Scratch
Example 2 illustrates how to define the values and column names of a new data frame within the data.frame function.
Consider the R code below:
data2 <- data.frame(x1 = c("x", "y", "x", "y"),    # Create new data frame
                    x2 = 14:11,
                    x3 = 9)
data2                                              # Print data frame
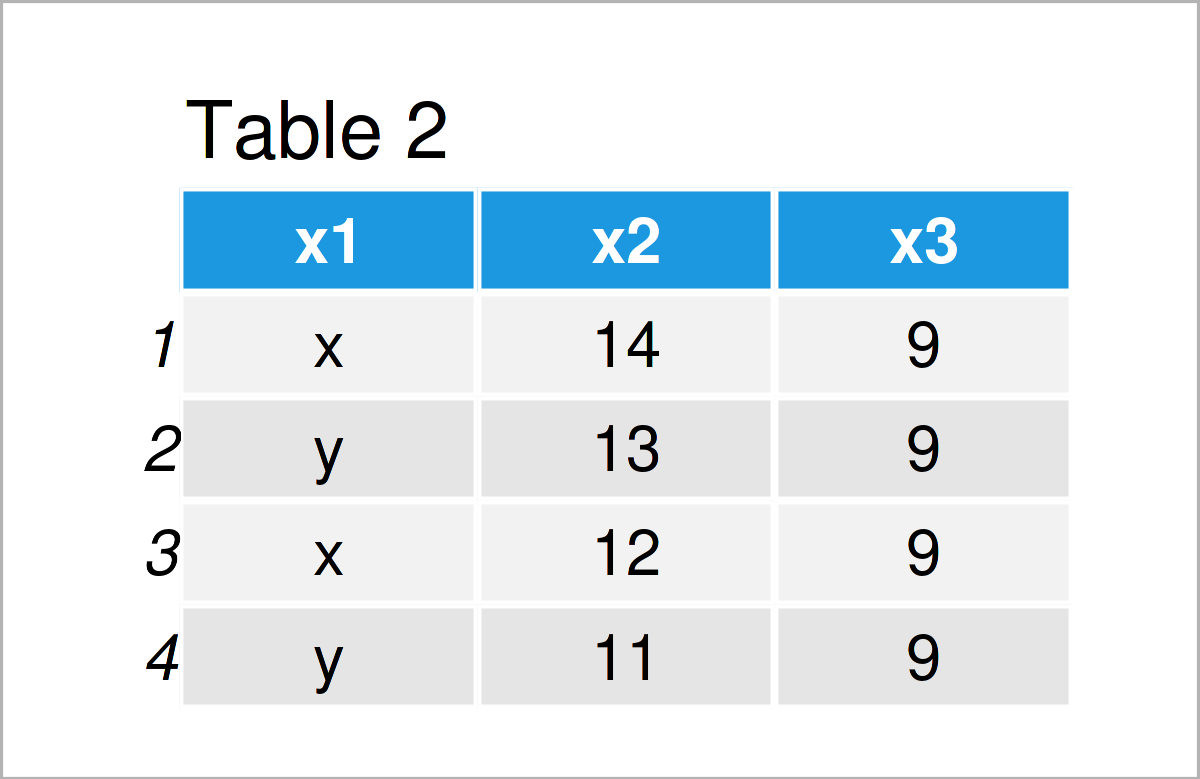
As illustrated in Table 2, we have created another data frame containing four rows and the three variables x1, x2, and x3.
Example 3: Create Data Frame from Matrix Object
In Example 3, I’ll explain how to construct a data frame object based on an already existing matrix.
For this example, we first have to create a new matrix object:
mat <- matrix(1:16, nrow = 4)                      # Create matrix
mat                                                # Print matrix
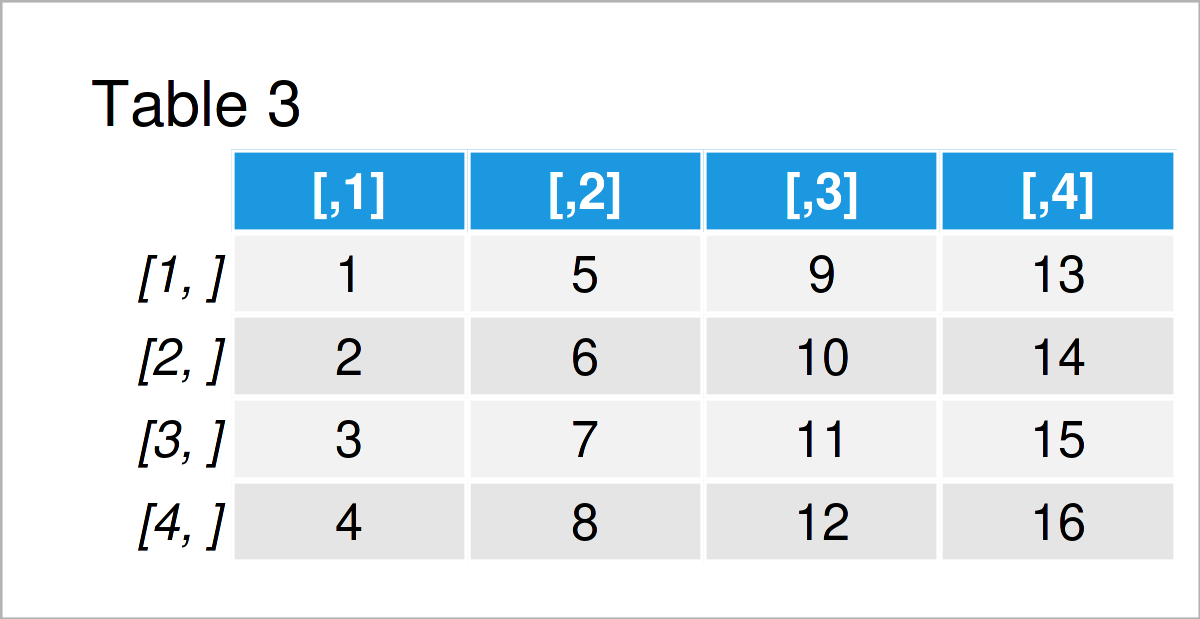
As shown in Table 3, the previous R code has created a matrix containing four rows and four columns.
In the next step, we can apply the as.data.frame function to our matrix to switch our data to the data.frame class:
data3 <- as.data.frame(mat)                        # Convert matrix to data frame
data3                                              # Print data frame
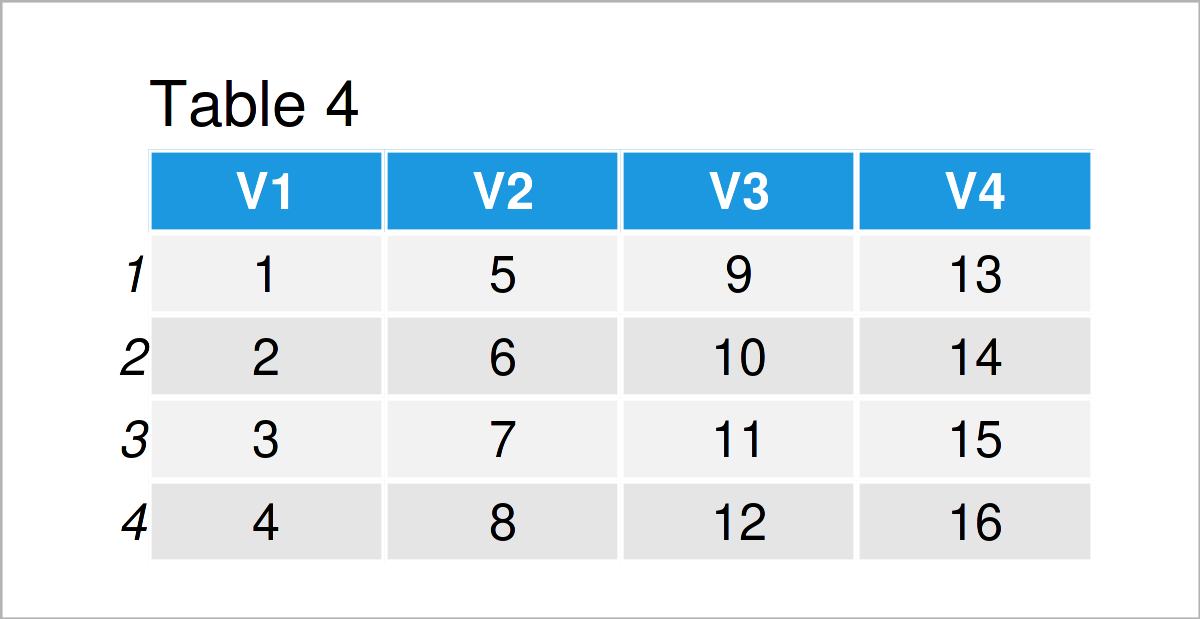
Table 4 shows the output of the previously shown syntax: A new data frame with the values of our input matrix. Note that the as.data.frame function has also labelled the columns with new column names.
Example 4: Create Data Frame Containing Random Values
The following R syntax explains how to generate a random data frame.
We first have to set a random seed to make the example reproducible.
set.seed(7823468) # Set random seed
Next, we can use the random numbers generating functions of the R programming language (i.e. rnorm, runif, and rpois) to generate several random variables with different distributions
data4 <- data.frame(rand1 = rnorm(100),            # Create random data frame
                    rand2 = runif(100),
                    rand3 = rpois(100, 3))
head(data4)                                        # Print data frame
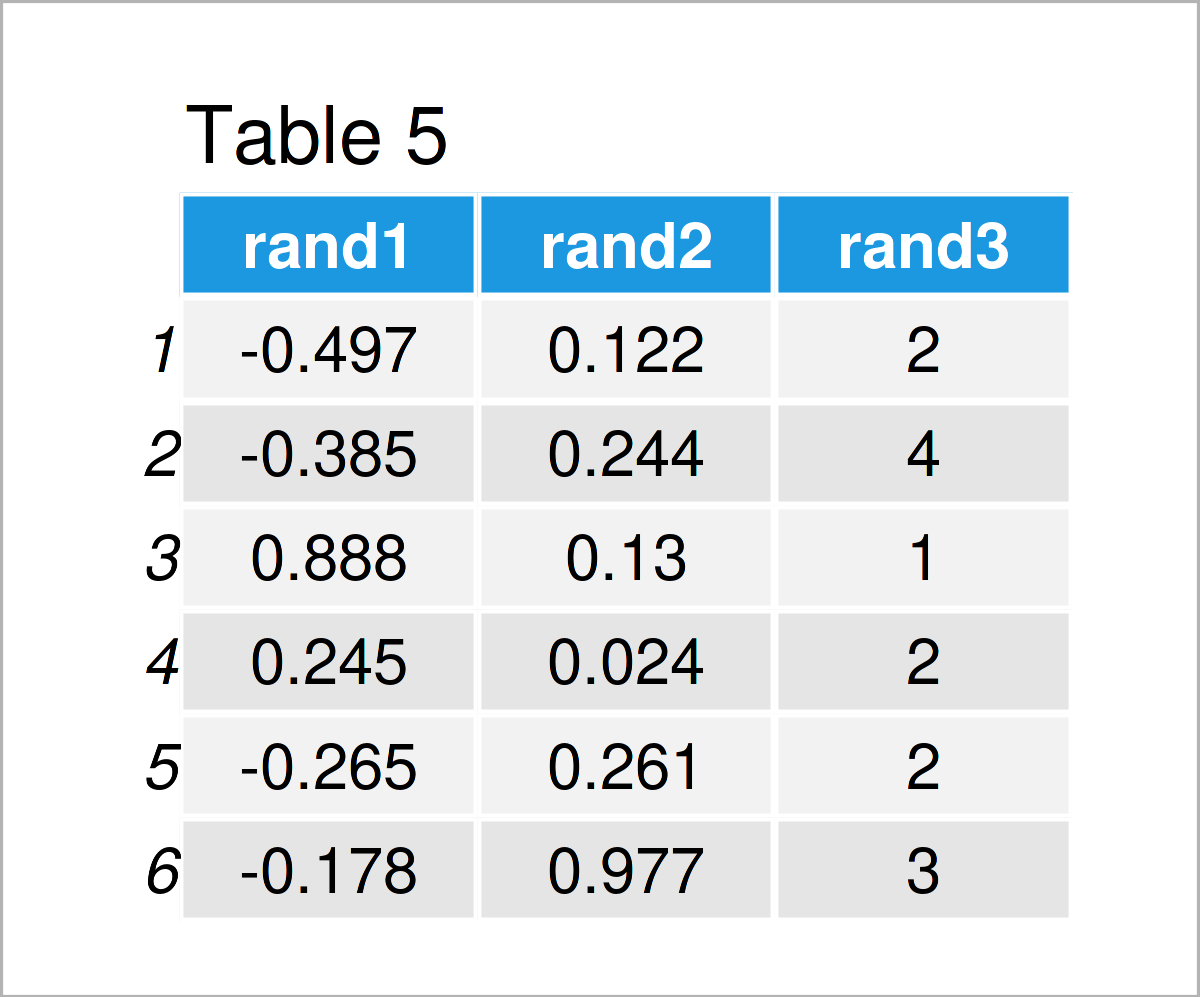
As shown in Table 5, we have created another data frame with the previous R syntax. This data frame contains 100 rows (the table above shows only the first six rows) containing randomly drawn values.
Example 5: Create Empty Data Frame with Column Names
Sometimes you might already know the columns that a new data frame should contain, but you don’t know the corresponding values yet (e.g. because you want to take these values from the output of a for-loop).
In this case, it might make sense to create an empty data frame with column names.
We can do that by using the different class functions, i.e. numeric(), factor(), character(), and integer() as shown below:
data5 <- data.frame(empt1 = numeric(),             # Create empty data frame
                    empt2 = factor(),
                    empt3 = character(),
                    empt4 = integer())
data5                                              # Print data frame
# [1] empt1 empt2 empt3 empt4
# <0 rows> (or 0-length row.names)
By running the previous R syntax, we have created an empty data frame with four variables, but without any values.
Video, Further Resources & Summary
Have a look at the following video on my YouTube channel. I demonstrate the R programming syntax of this tutorial in the video.
The YouTube video will be added soon.
In addition, you might have a look at the other tutorials on this homepage:
- Create Data Frame of Unequal Lengths
- Create Data Frame Row by Row
- Create Data Frame with Spaces in Column Names
- Create List of Data Frames in R
- R Programming Overview
To summarize: You have learned in this tutorial how to initialize and declare a new data frame in the R programming language. If you have further questions, don’t hesitate to tell me about it in the comments section. Furthermore, don’t forget to subscribe to my email newsletter to get updates on new articles.


