Split Data Frame into Custom Bins in R (Example)
In this article, I’ll show how to divide data frames into custom bins in the R programming language.
Table of contents:
It’s time to dive into the exemplifying R code.
Creating Example Data
Before all else, I have to create some data that we can use in the examples below:
data <- data.frame(x1 = letters[1:10],    # Create example data
                   x2 = 10:1,
                   x3 = "o")
data                                      # Print example data

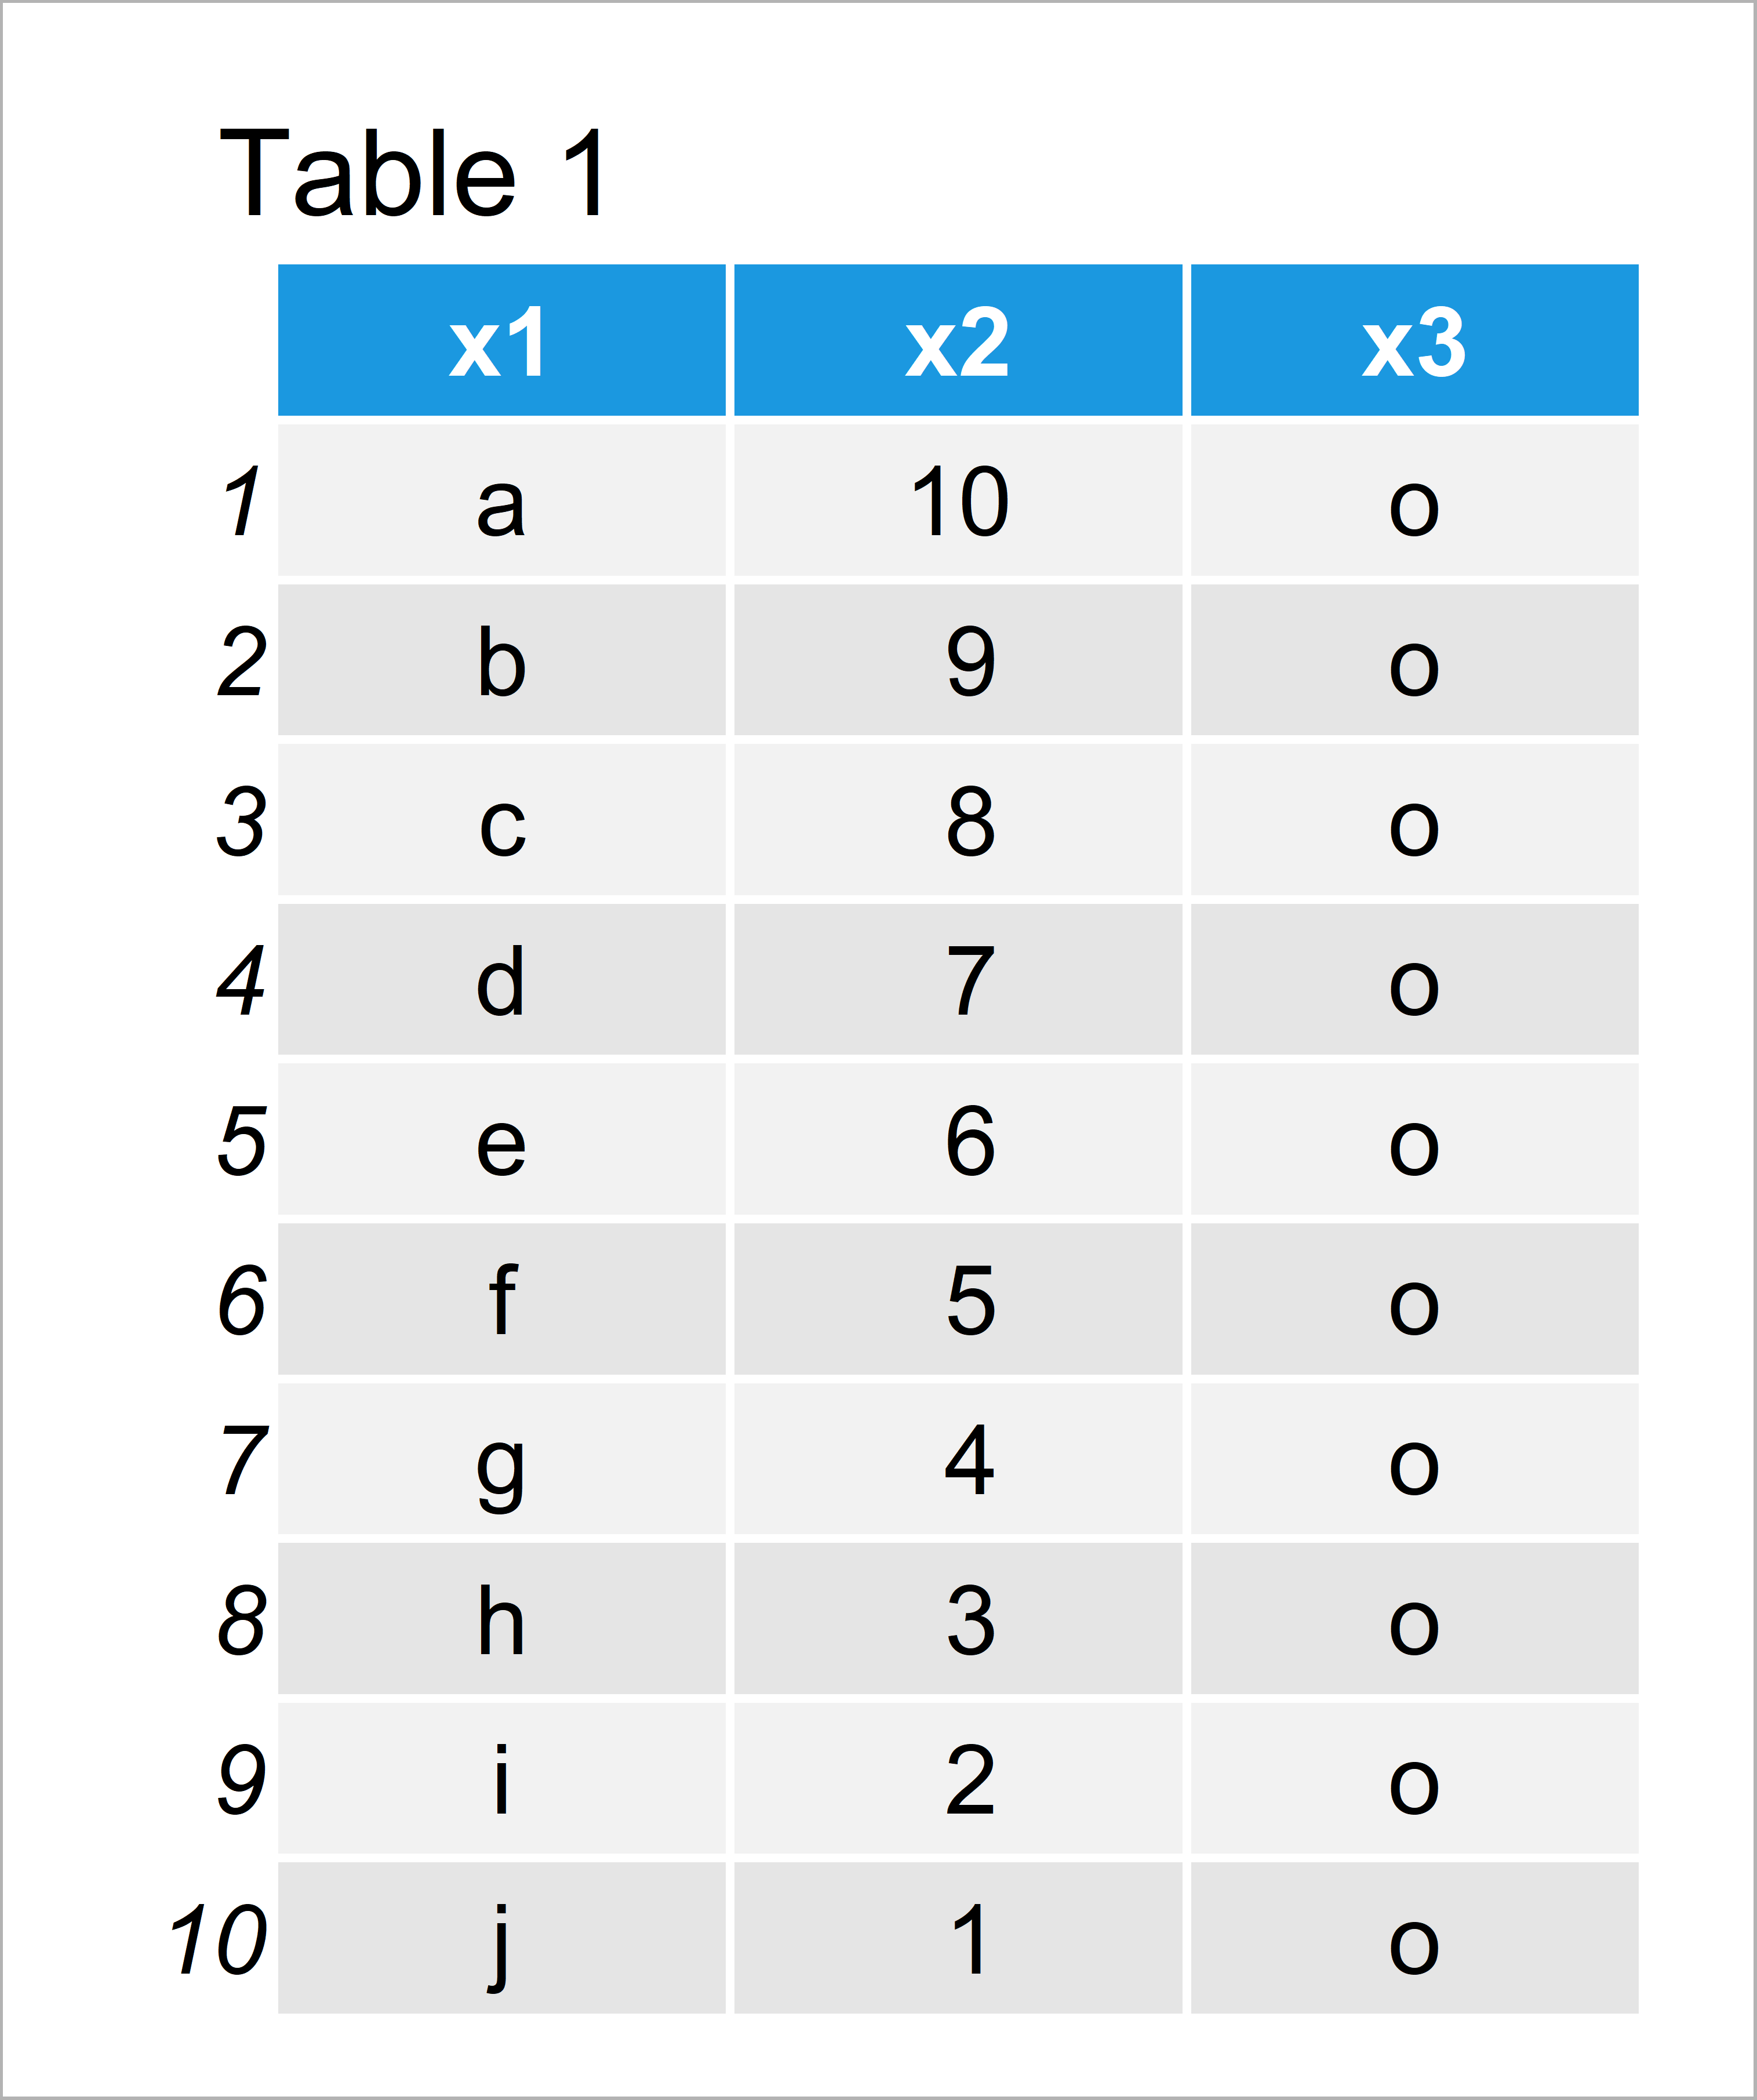
As you can see based on Table 1, our example data is a data frame constituted of ten rows and three columns.
Example: Divide Data Frame into Custom Bins Using cut() Function
In this section, I’ll illustrate how to define and apply custom bins to a data frame using the cut() function in R.
First, we have to apply the cut function to define the groups of our data. In this example, I’m specifying two cut-points, i.e. three different groups:
my_cuts <- cut(1:nrow(data),              # Applying cut function
               breaks = c(0,
                          3, 8,           # This line defines the cut points
                          nrow(data)))
my_cuts                                   # Print cuts in RStudio
#  [1] (0,3]  (0,3]  (0,3]  (3,8]  (3,8]  (3,8]  (3,8]  (3,8]  (8,10] (8,10]
# Levels: (0,3] (3,8] (8,10]
As you can see, we have created a vector that defines different groups of our data frame.
Next, we can use this vector to create new data frame subsets within a for-loop:
for(i in 1:length(levels(my_cuts))) {     # Create separate data frame subsets
  assign(paste0("data_", i),
         data[my_cuts == levels(my_cuts)[i], ])
}
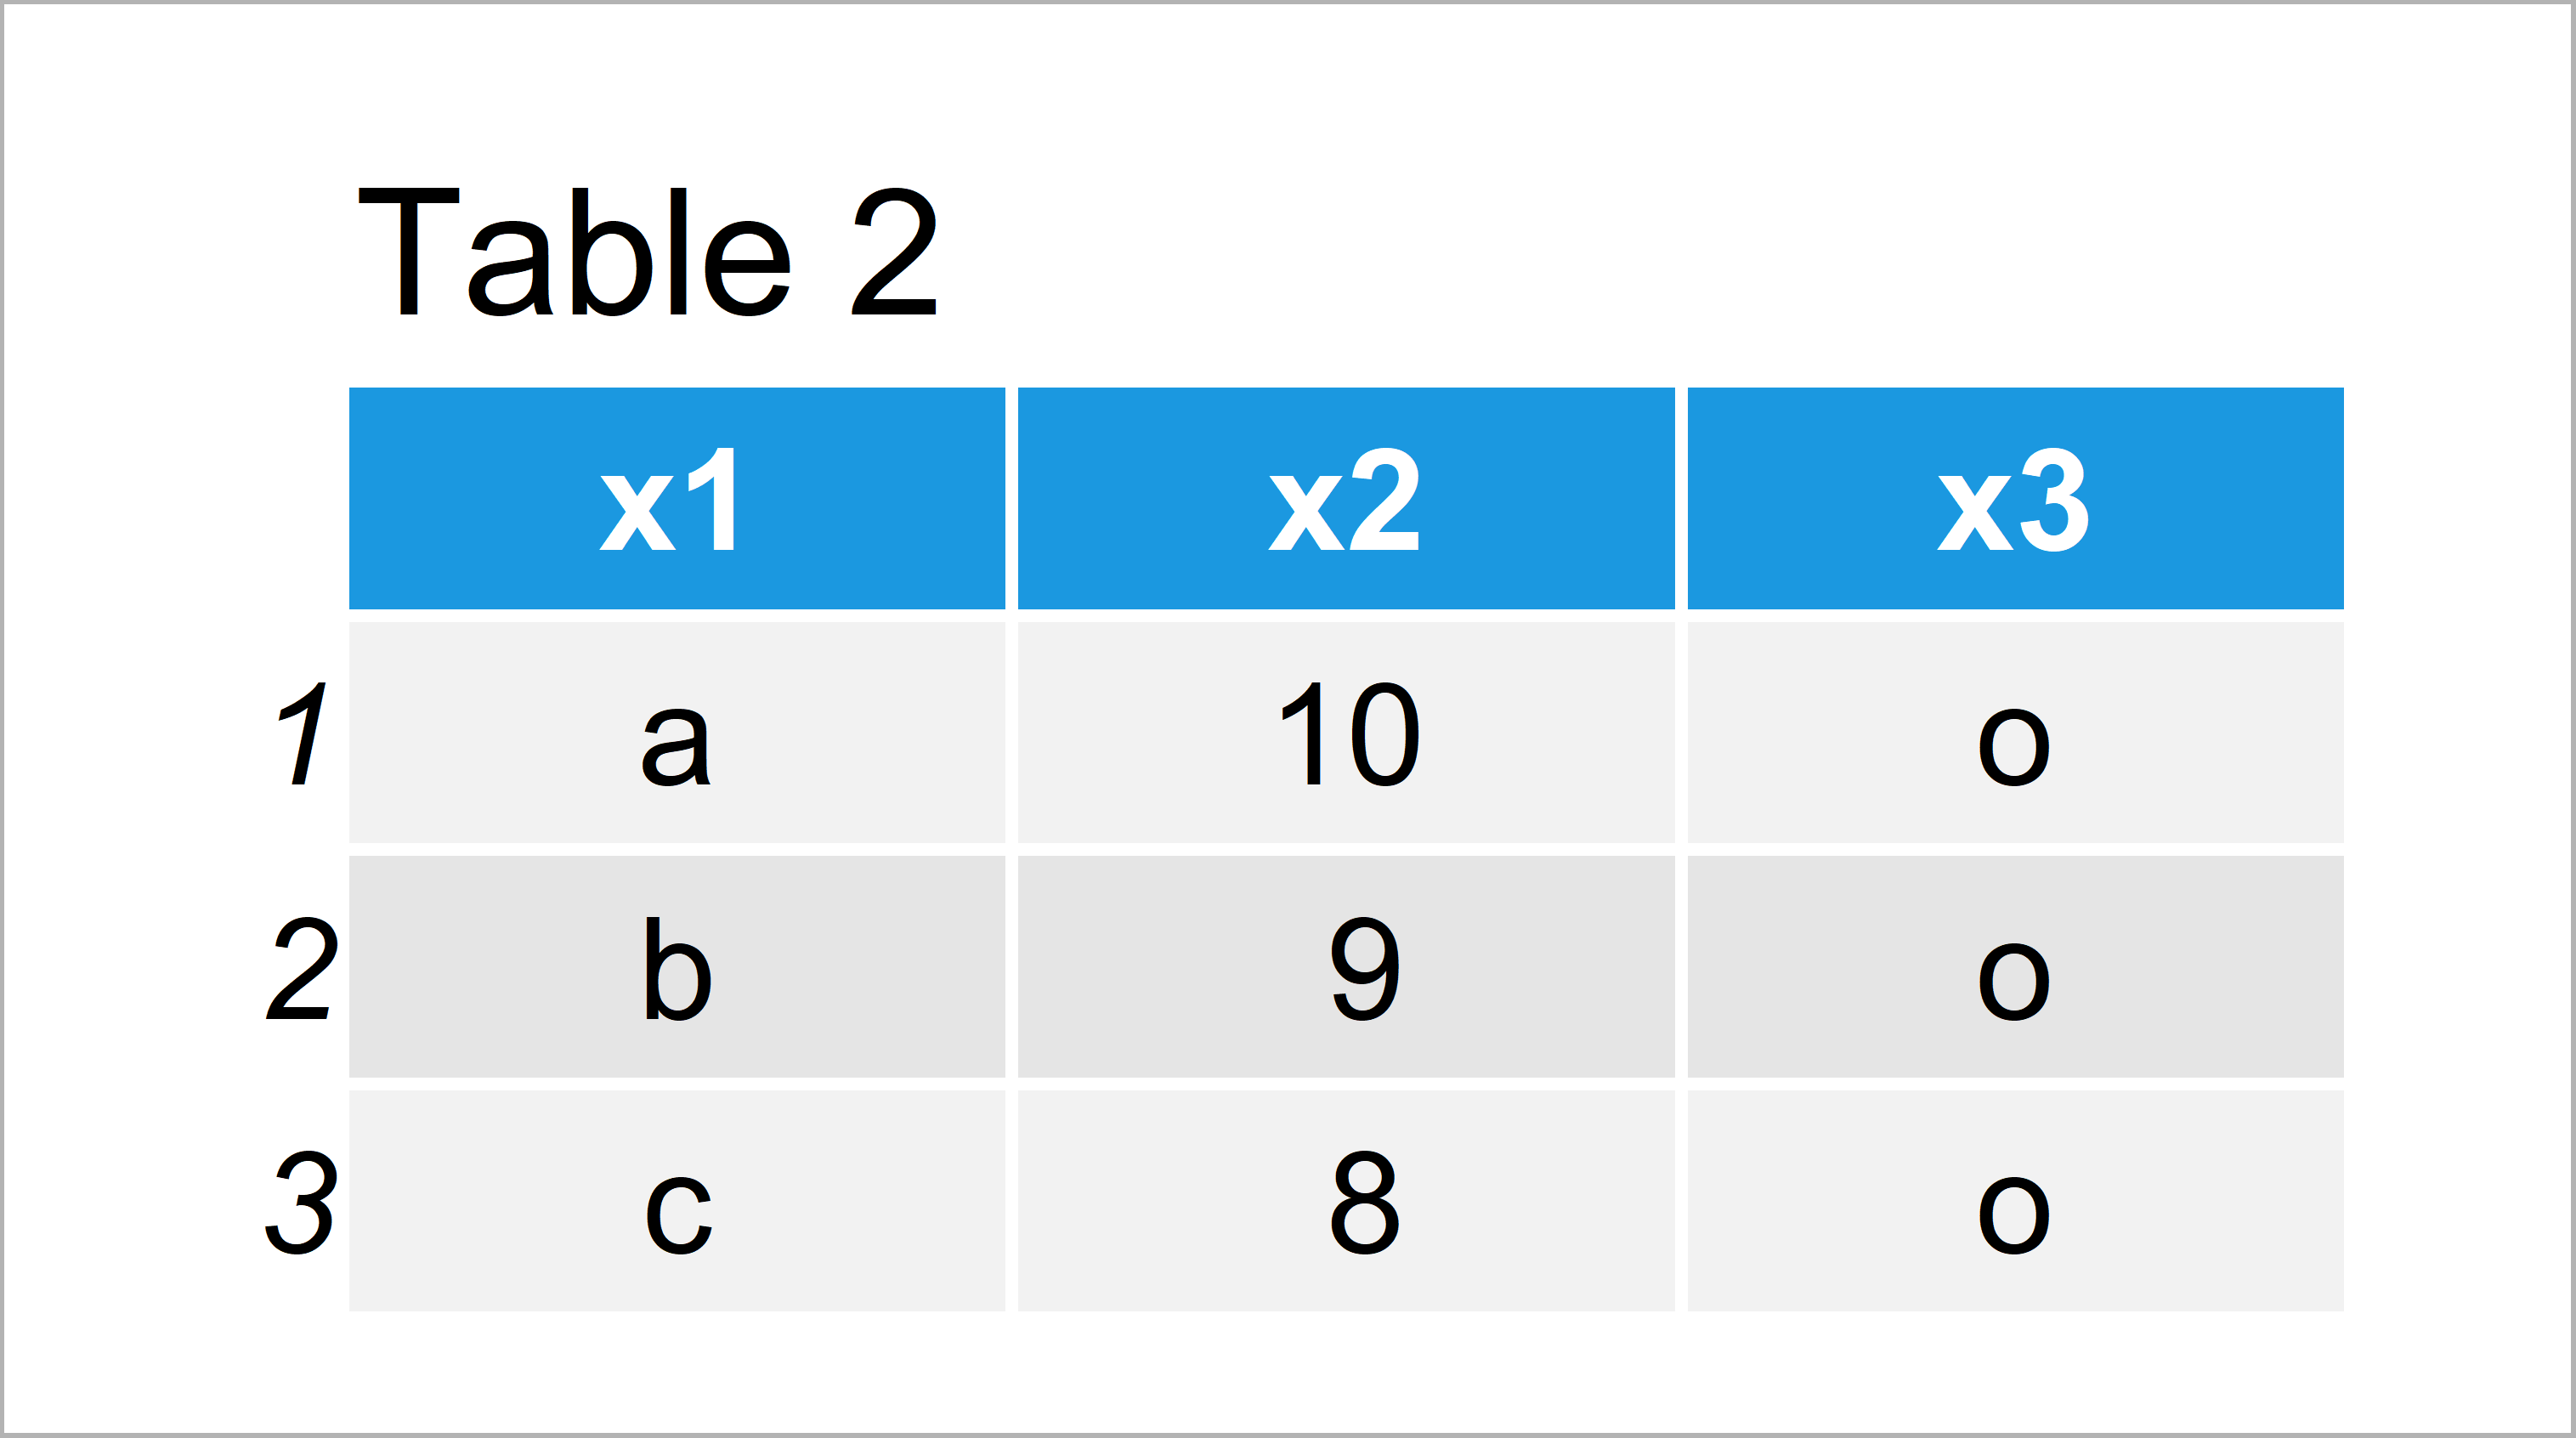
Let’s have a look at our new data frames. The first data frame subset looks like this…
data_1 # Print first data frame subset

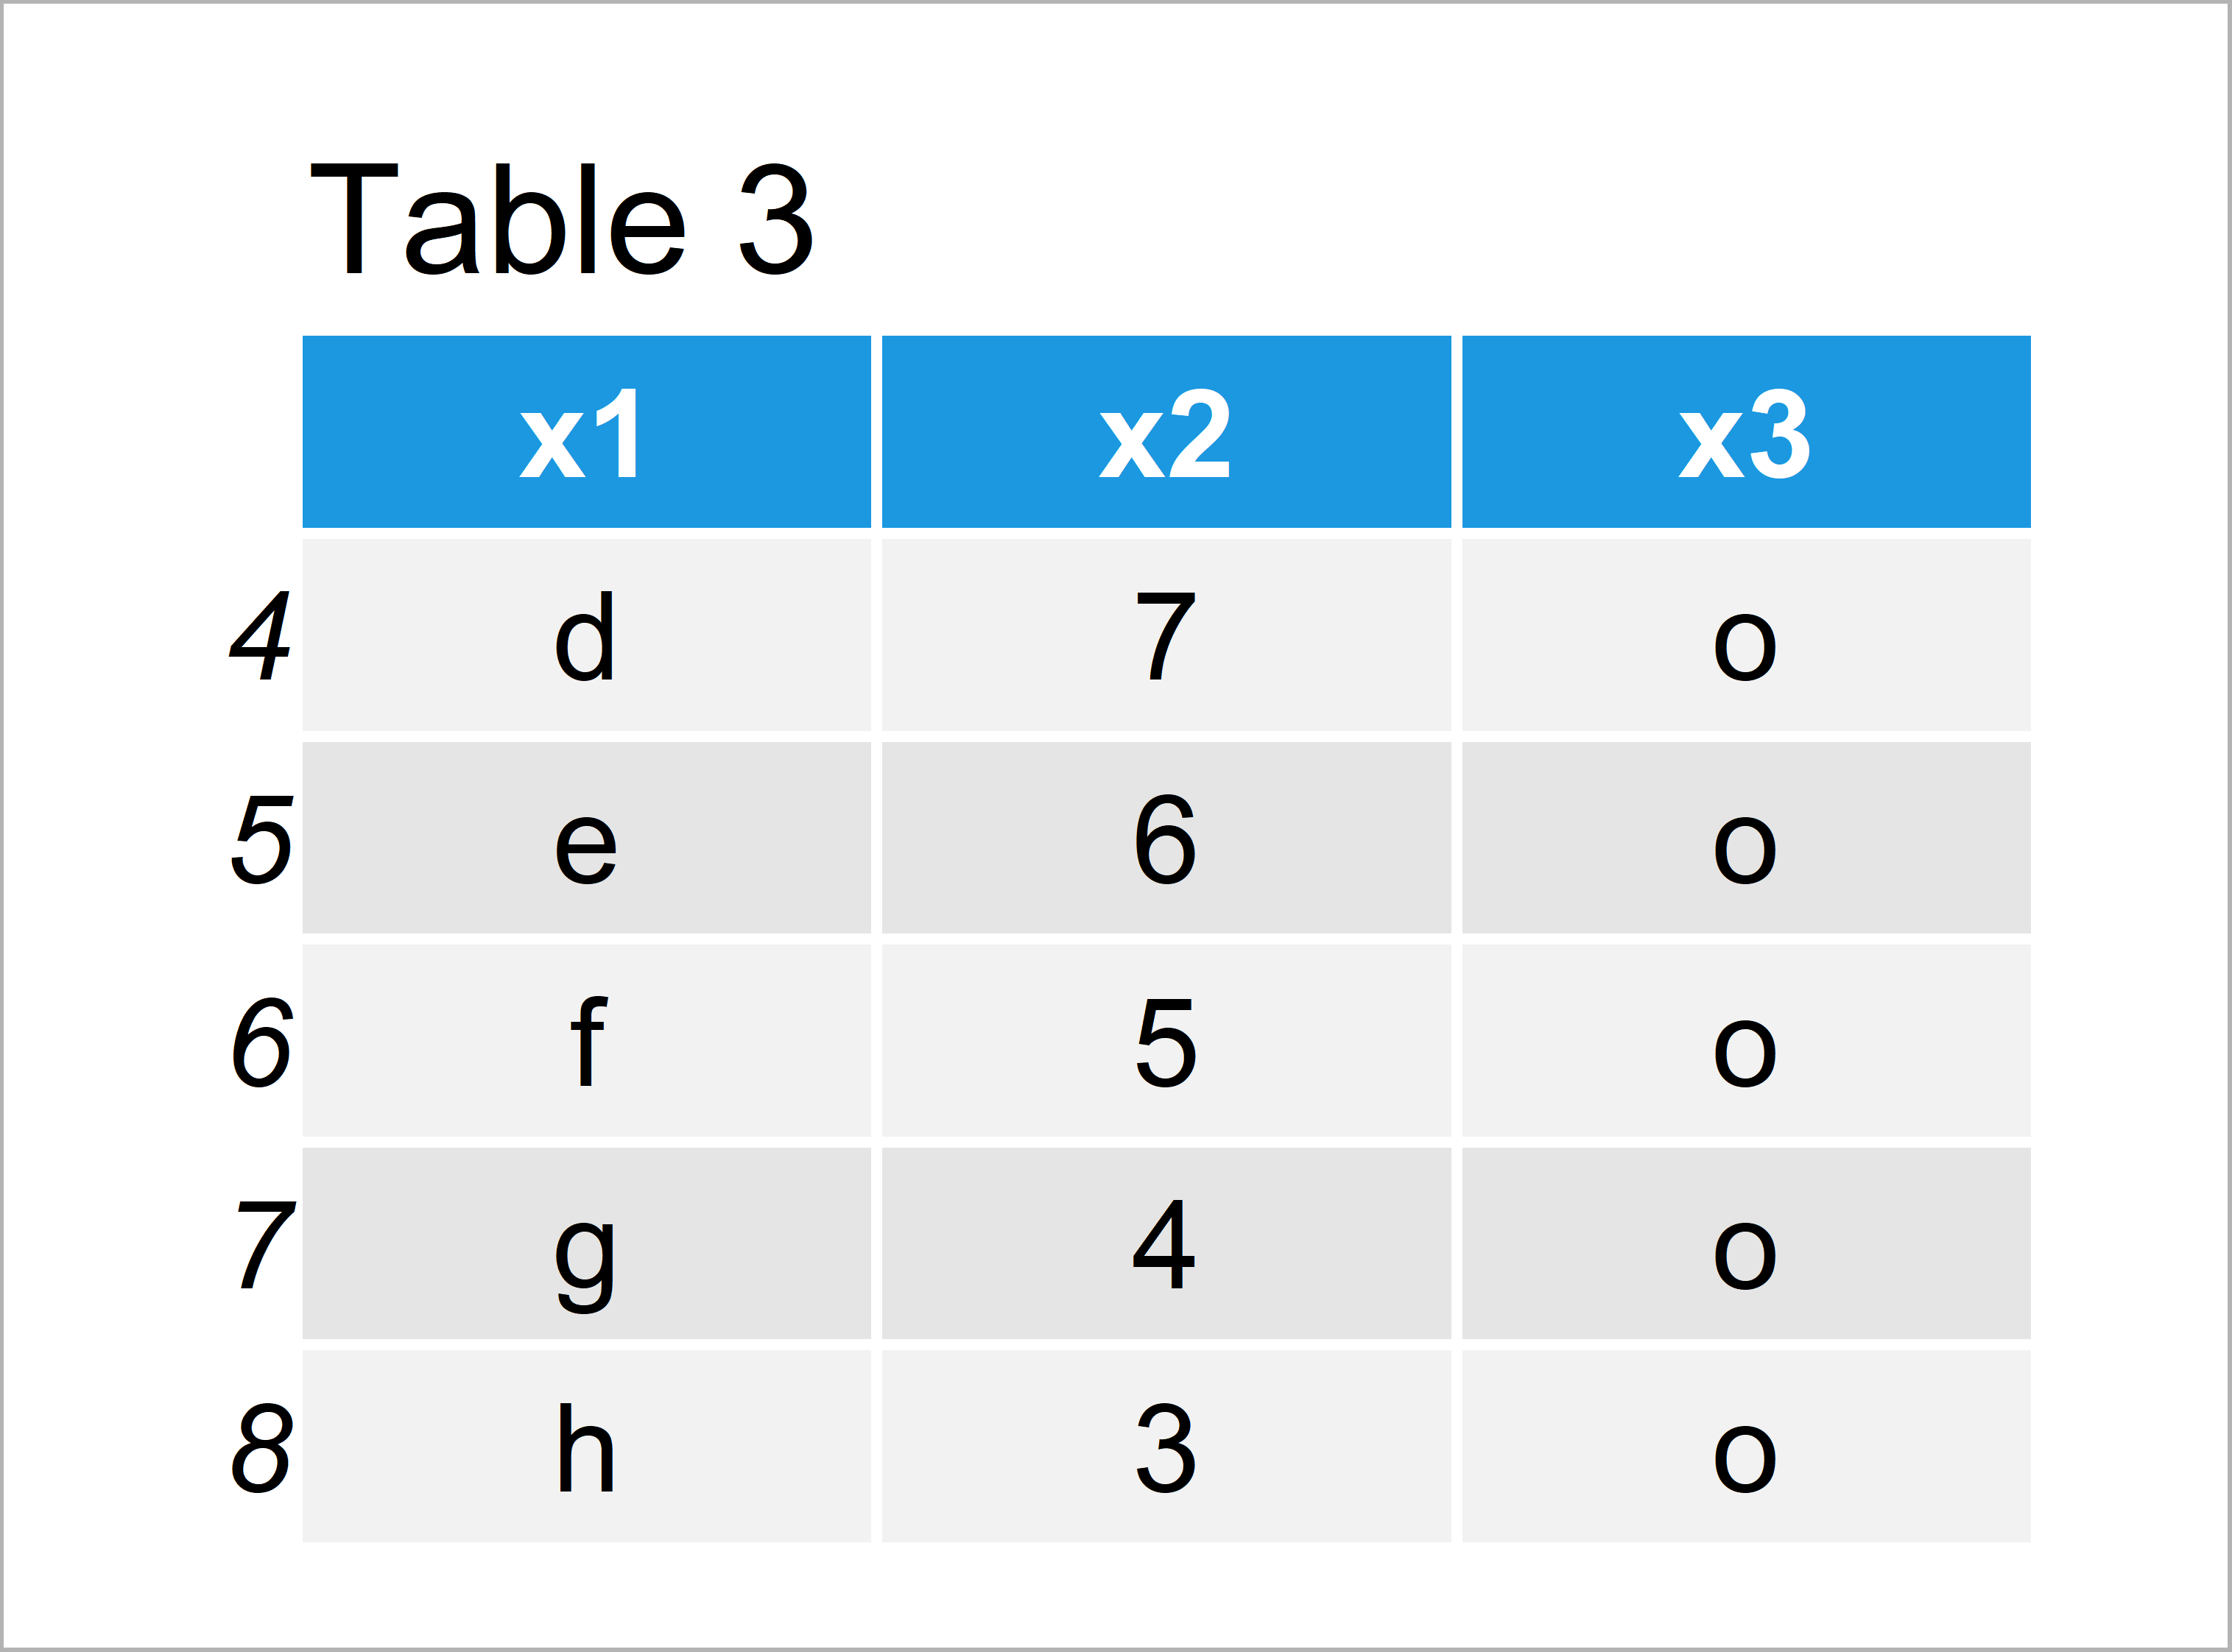
…the second data frame looks like this…
data_2 # Print second data frame subset

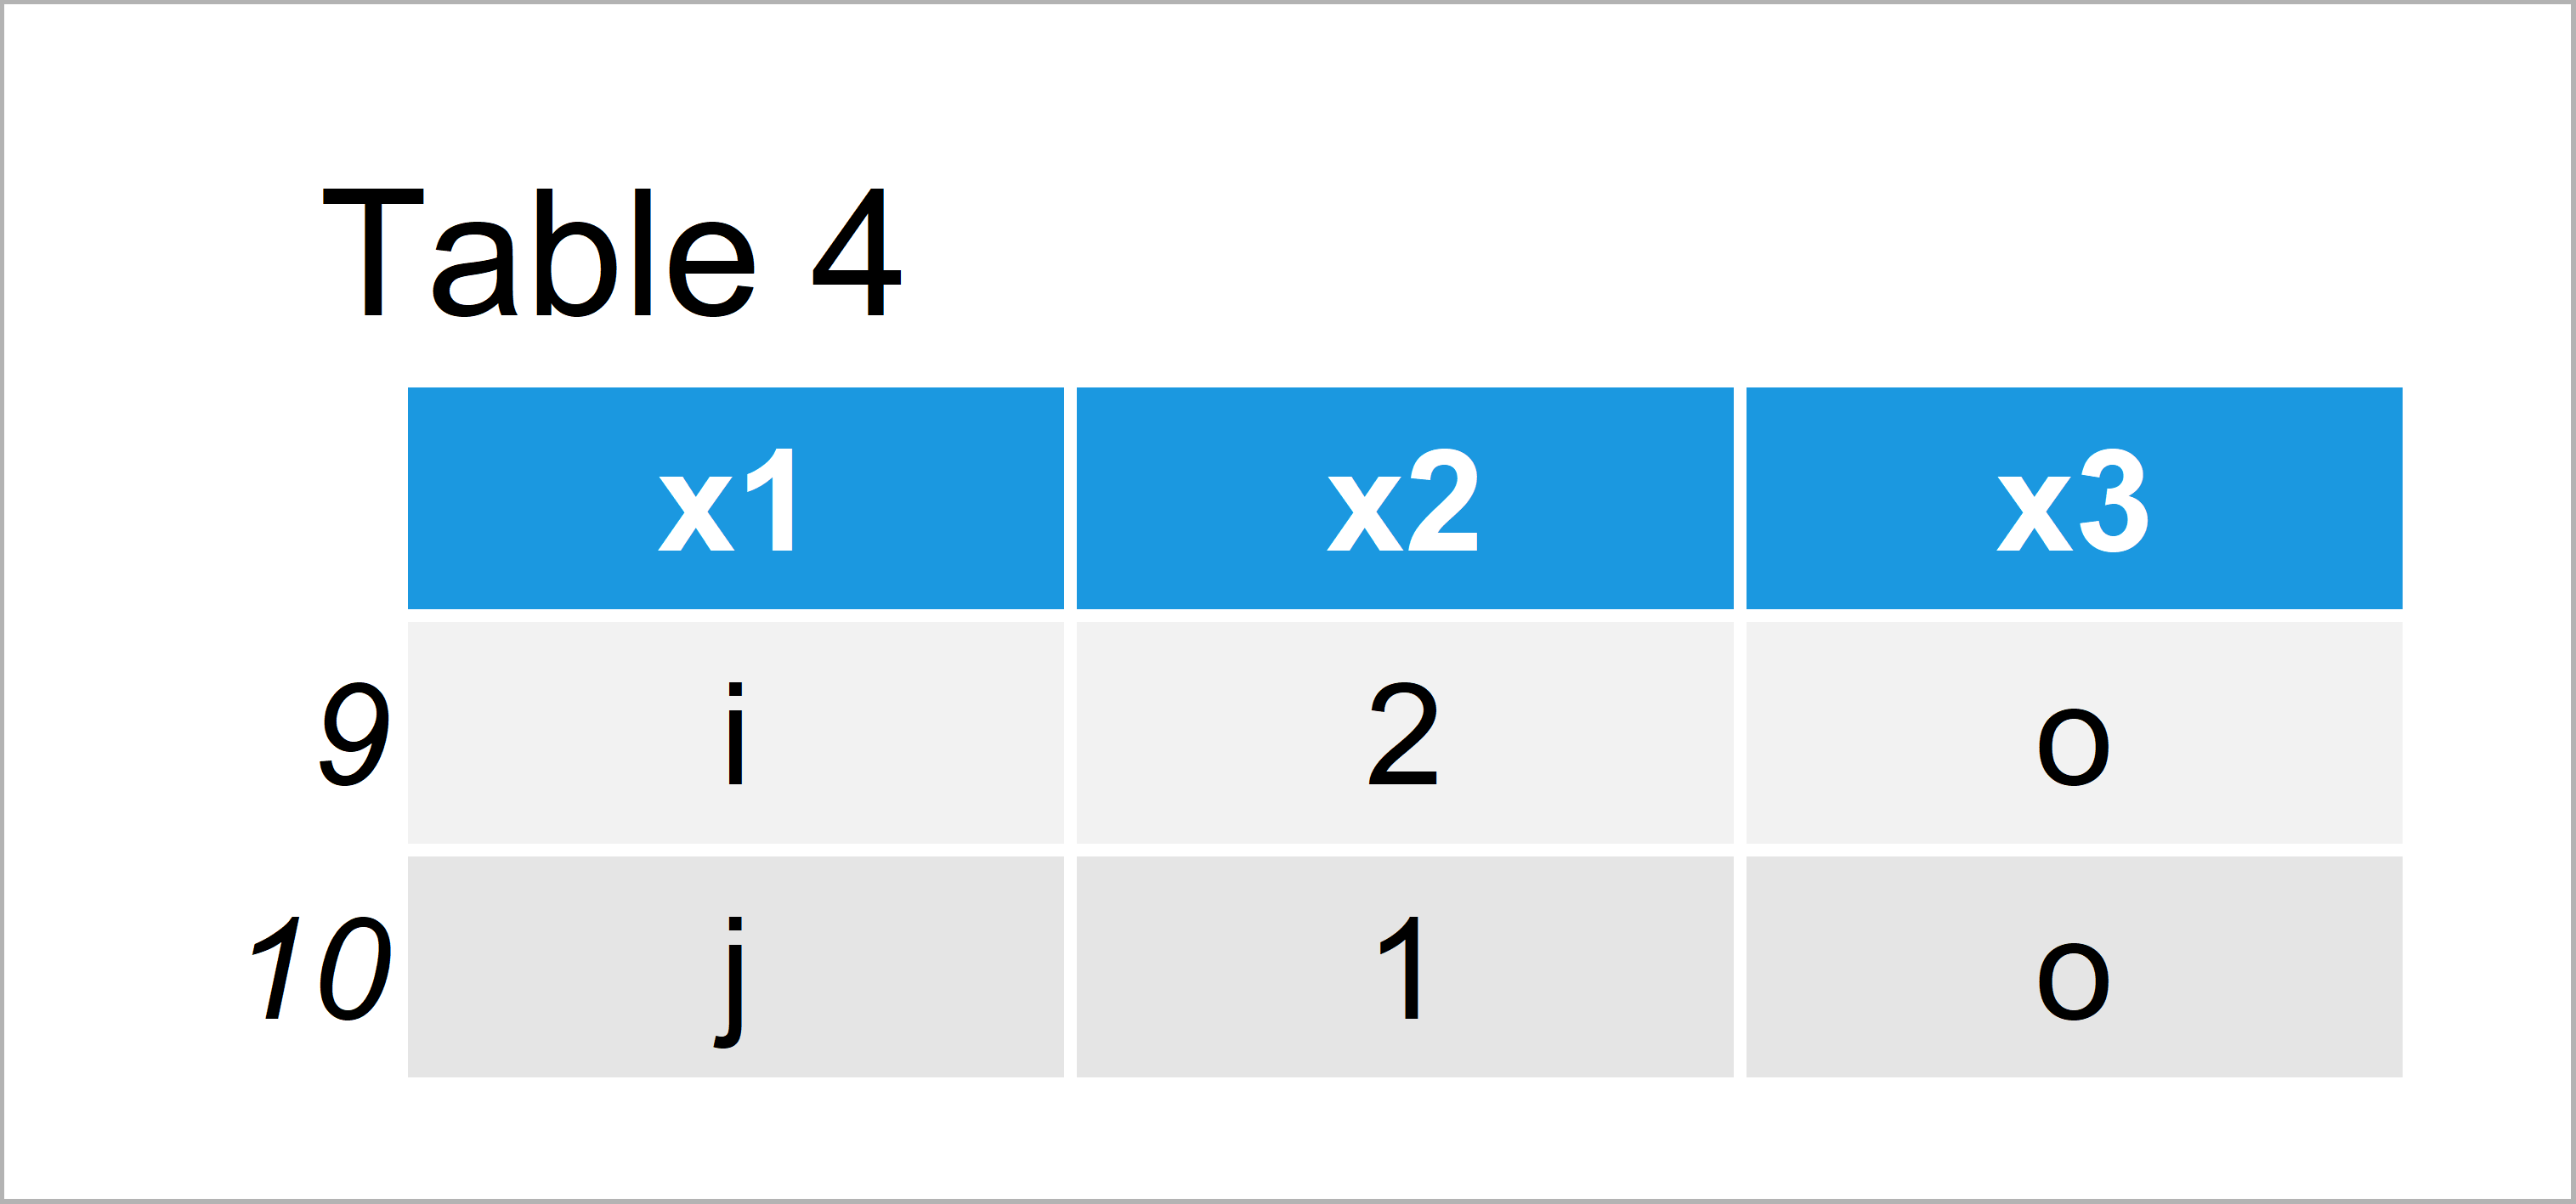
…and the third data frame looks like this:
data_3 # Print third data frame subset

As you can see, we have created three different data frame subset with manually specified size and rows.
Video & Further Resources
I have recently published a video on my YouTube channel, which illustrates the R code of this post. You can find the video below.
In addition, you may have a look at the other articles of this website.
- Split Data into Train & Test Sets
- Split Data Frame Variable into Multiple Columns in R
- Split Data Frame into List of Data Frames Based On ID Column
- R Programming Examples
In this R tutorial you have learned how to subset a data frame into multiple custom bins. Please let me know in the comments below, in case you have additional comments and/or questions.


