Create Data Frame with Column Names in R (4 Examples)
In this article, you’ll learn how to make a data frame with column names in the R programming language.
The tutorial will contain these topics:
Here’s how to do it:
Example 1: Create Data Frame with Values & Column Names from Scratch
This example demonstrates how to make a data frame with column names and values from scratch.
To accomplish this task, we can apply the data.frame function as shown below. The column names are specified within the data.frame function:
data1 <- data.frame(x1 = 10:5,                     # Create data frame
                    x2 = letters[1:6],
                    x3 = "x")
data1                                              # Print data frame

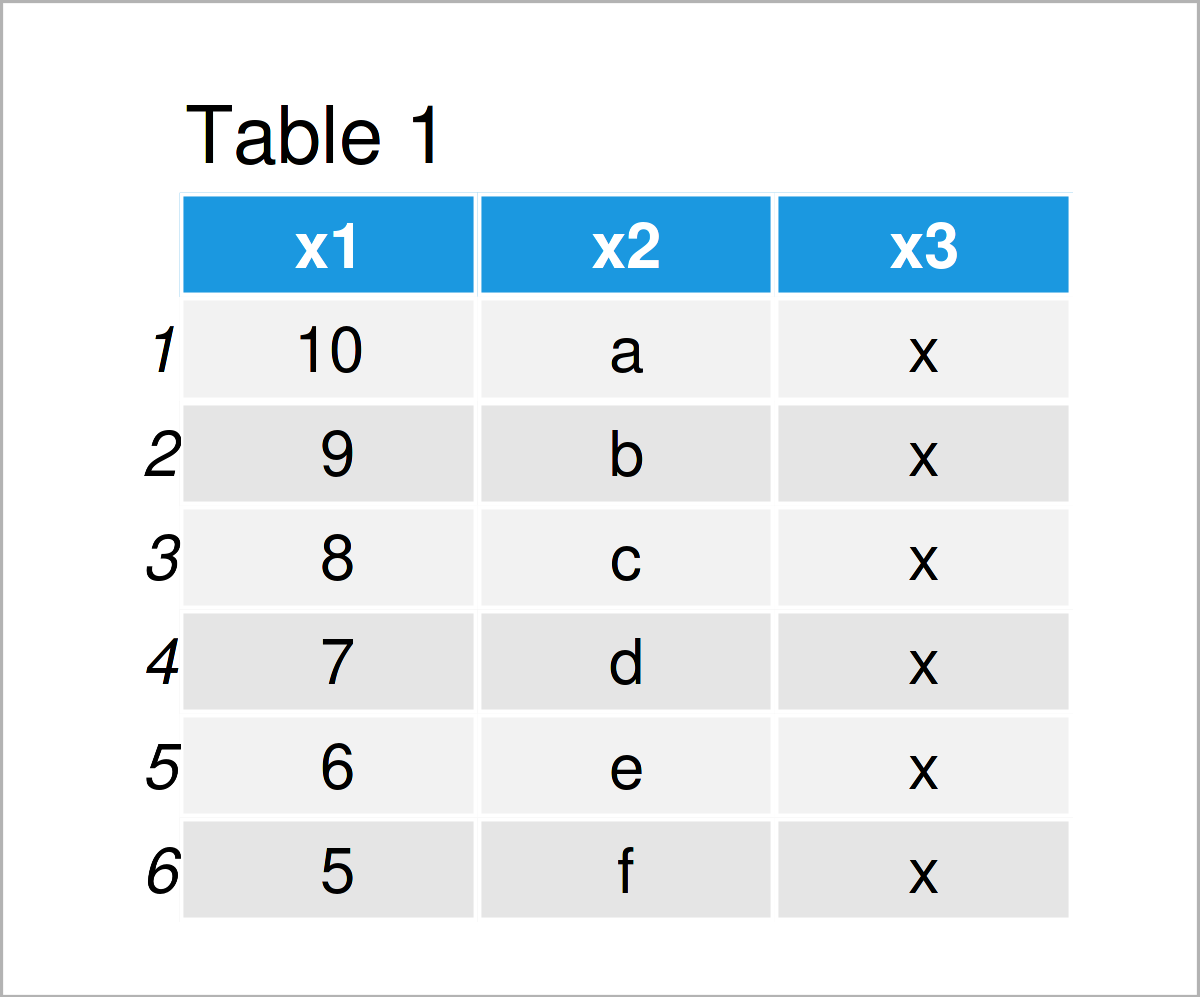
As shown in Table 1, the previous syntax has created a data frame with the variable names x1, x2, and x3.
Example 2: Create Data Frame with Column Names from Matrix
It might be the case that you already have a matrix that you want to convert to the data.frame class.
Let’s create an example matrix first:
mat <- matrix(1:15, ncol = 5)                      # Create matrix
mat                                                # Print matrix

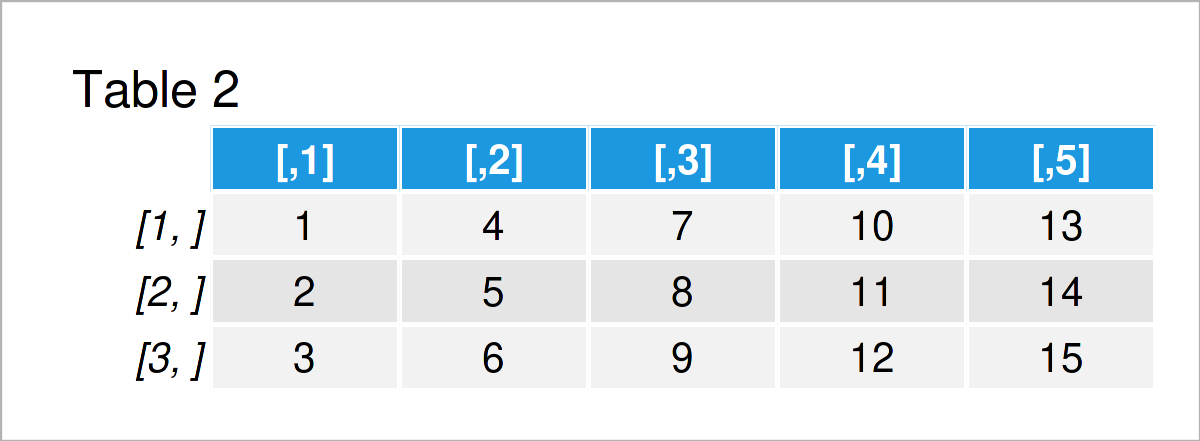
As shown in Table 2, the previous syntax has created a matrix object. You can also see that this matrix does not have any column names.
We can now use the as.data.frame function to change the class of the matrix to a data frame:
data2 <- as.data.frame(mat)                        # Create data frame
data2                                              # Print data frame

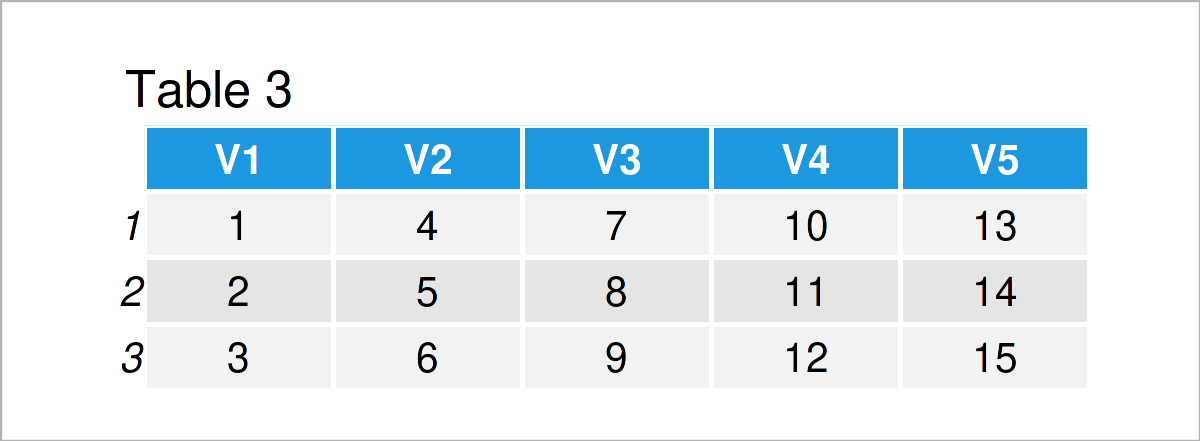
As revealed in Table 3, the previously shown R programming syntax has managed to create a new data frame from our input matrix. Note that this data frame has column names.
Example 3: Change Column Names of Data Frame
The following R code demonstrates how to rename the column names of a data frame.
The following R syntax first duplicates the data frame data2 that we have built up in the previous example, and then it adjusts the names of the variables using the paste0 function:
data3 <- data2                                     # Duplicate data frame
colnames(data3) <- paste0("Col_", LETTERS[1:5])    # Create data frame
data3                                              # Print data frame

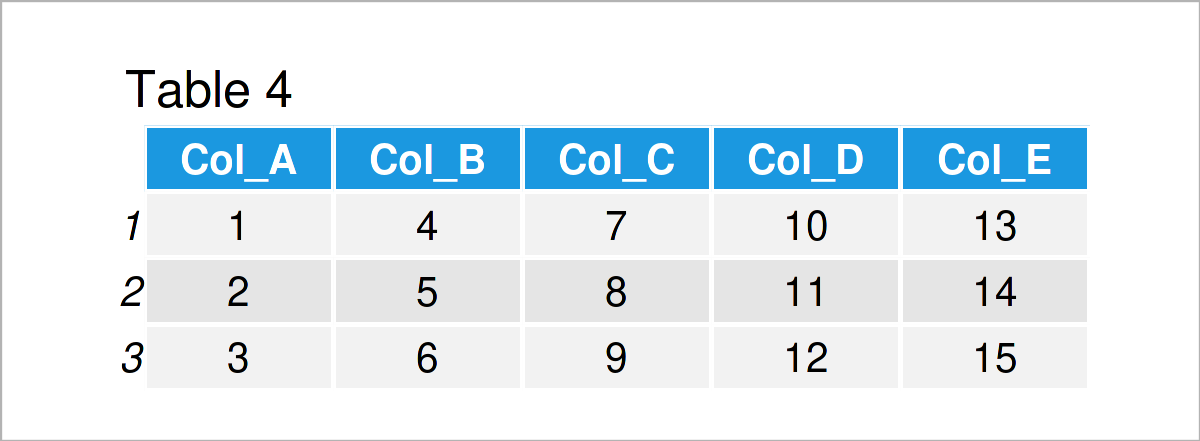
The output of the previous R programming code is shown in Table 4 – A data frame with replaced variable names.
Example 4: Create Empty Data Frame with Column Names
So far, we have created data frame objects with values. In Example 4, I’ll show how to populate an empty data frame with column names.
For this, we can use the different class functions provided by the R programming language. The following R code constructs an empty data frame with three columns that have the classes numeric, character, and factor.
data4 <- data.frame(A = numeric(),                 # Create data frame
                    B = character(),
                    C = factor())
data4                                              # Print data frame
# [1] A B C
# <0 rows> (or 0-length row.names)
As shown in the previous output, we have created a data frame with zero rows.
Video, Further Resources & Summary
I have recently released a video on my YouTube channel, which illustrates the R syntax of this tutorial. Please find the video below:
Besides that, you may read some of the other tutorials on this website:
- Convert Values in Column into Row Names of Data Frame
- Convert Row Names into Column of Data Frame
- X. Prefix in Column Names when Reading Data Frame
- Set Row & Column Names of Data with Unknown Dimension
- R Programming Examples
You have learned in this tutorial how to construct a data frame with column names in R programming. Don’t hesitate to let me know in the comments section, if you have any further questions.


