Image Classification Using Hugging Face transformers pipeline in Python (Example)
Hi! In this tutorial, we will build an image classification application using the Hugging Face transformers pipeline in the Python programming language.
In the previous tutorial, we were introduced to image classification, what it is, its types, and its applications. If you have not gone through that tutorial yet, I would encourage you to do so before reading this one so that it is easier for you to understand what we will be doing. You can access it here.
Here is an overview:
Let’s get started!
What are Hugging Face pipelines?
Hugging Face is an artificial intelligence community on a mission to democratize machine learning, one commit at a time.
Hugging Face pipelines are objects that make it easy to use complex machine learning code from the transformers library for a host of different tasks, such as sentiment analysis, question answering, speech recognition and named entity recognition.
We will use these pipelines in our image classification project in this tutorial!
GPU Powered Python Programming IDE
In order to be able to run the pre-trained image classification model that we will use in this tutorial, you will need a computer that has a GPU.
A regular CPU computer might not be powerful enough to download and run the model in order to get a prediction.
If your computer has a GPU, then your Python programming IDE should be able to run the code. Otherwise, an easy and free-to-use IDE that gives you access to a free GPU is Google’s Colaboratory IDE.
To use the IDE, go to the Colab website, then go to “File” in the menu tab above and then click on “New notebook”.
That will launch a new interactive notebook similar to a Jupyter notebook with code cells that can be run. You can give the notebook a title if you like.
Next, go to “Runtime” and select “Change runtime type”. Click the dropdown under “Hardware accelerator” and select “GPU”, then click “Save”.
Now, you have access to a GPU-powered Python programming IDE that has 12GB of RAM and 78GB of disk space.
Install transformers Library & Import pipeline
With our Colab IDE configured and ready to run code, let us now install the Hugging Face transformers library and import pipeline.
Run the code below in a code cell in Colab by either pressing the play button on the left side of the cell or hitting “CTRL + Enter” on your keyboard:
# install transformers
!pip install transformers

# import pipeline
from transformers import pipeline
You will notice the exclamation mark (!) preceding “pip” in the code above. That is a bash command tells the notebook to execute the rest of the command line in the shell, rather than in the Python environment.
Build pipeline & Classify Image
Now that we have installed transformers and imported pipeline, let us now build the pipeline and classify an image.
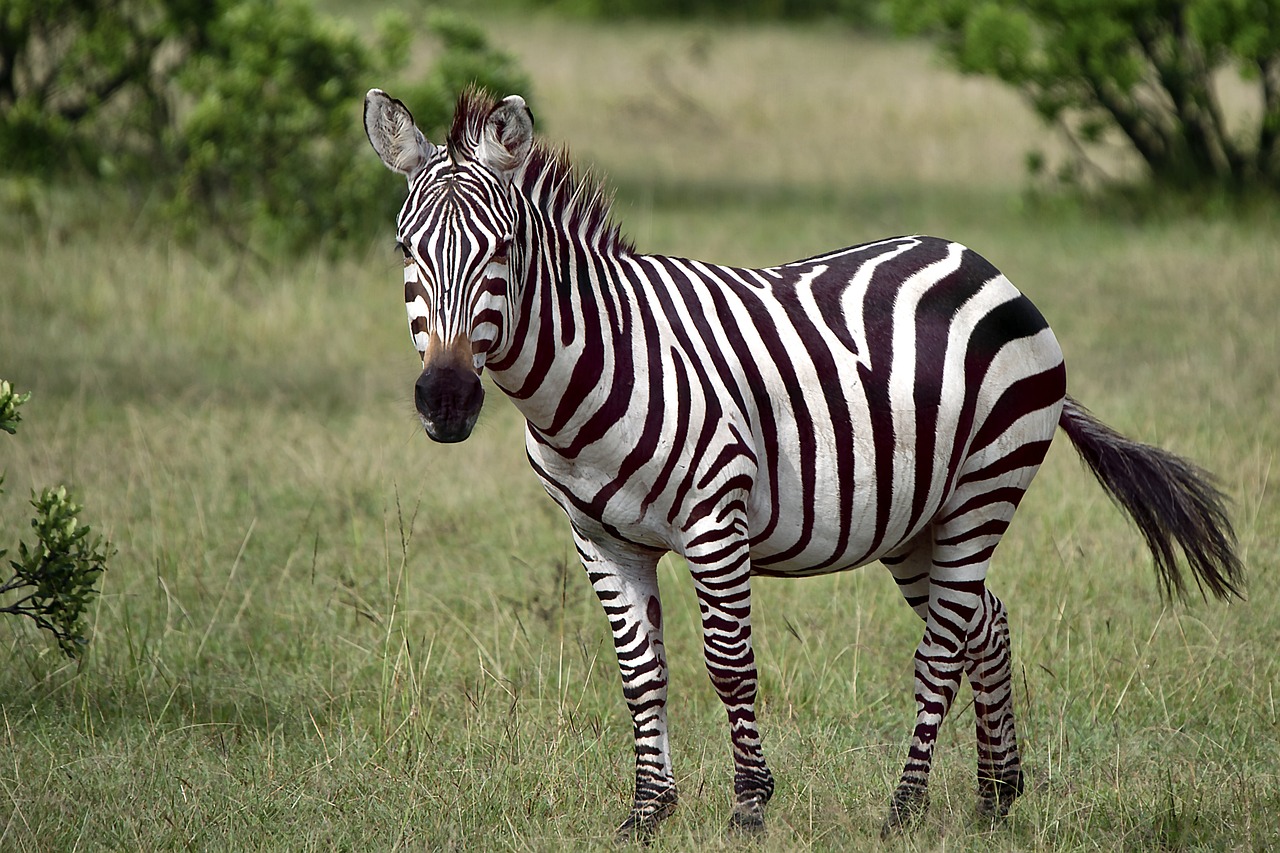
We will give the AI the image of a zebra and see whether it will correctly classify it.
Here’s the image:

And here’s the code to classify it:
model = "google/vit-base-patch16-224"

image = "https://statisticsglobe.com/wp-content/uploads/2023/06/zebra-image-classification-example.jpg"

image_classifier = pipeline("image-classification", model = model)

image_classifier(images = image)
# [{'score': 0.9974074959754944, 'label': 'zebra'},
#  {'score': 0.0003103635099250823, 'label': 'impala, Aepyceros melampus'},
#  {'score': 0.00027453029179014266, 'label': 'gazelle'},
#  {'score': 0.00024571214453317225, 'label': 'hartebeest'},
#  {'score': 0.00017419962387066334, 'label': 'warthog'}]
In the above example, we first defined the image classification model we want to use, which is google/vit-base-patch16-224. If you do not define a model, the pipeline will download the current default model. However, specifying a model is recommended, since the default model and its revision may change over time as new models and versions are released.
This could lead to unexpected results or behaviors in a production environment, since your model may change without you realizing it. You can see the other models listed on the HuggingfaceHub.
Next, we built our image classifying pipeline using the pipeline() function wherein we specified the kind of task we would like to perform "image-classification" and parsed the model as well.
After that, we ran a prediction on our image image using the pipeline we just built and obtained a prediction.
As you can see, the model correctly predicted a zebra with a near 100% percent accuracy, check the given score 0.9974074959754944 for 'label':'zebra'.
However, it is important to note that misclassifications can occur, as with all machine learning models. That is why models are constantly being fine-tuned and optimized in order to keep getting accurate predictions.
You can play around with a web version of this application here.
Video, Further Resources & Summary
Do you need more explanations on how to build an image classification application using the Hugging Face transformers pipeline? Then you should take a look at the following YouTube video of the Statistics Globe YouTube channel.
In the video, we explain in some more detail how to build an image classification application using the Hugging Face transformers pipeline.
The YouTube video will be added soon.
Furthermore, you could have a look at some of the other image classification tutorials on Statistics Globe:
This post has shown how to build an image classification application using Hugging Face transformers pipeline. I hope you found it helpful! In case you have further questions, you may leave a comment below.
This page was created in collaboration with Ifeanyi Idiaye. You might check out Ifeanyi’s personal author page to read more about his academic background and the other articles he has written for the Statistics Globe website.


2 Comments. Leave new
Could you make the same using R? I just love to explore all this with R🫠
Hello Samrit,
Thank you for the feedback. It is noted.
Best,
Cansu