How to Apply a Function to Each Element of a Matrix in R (2 Examples)
This page explains how to apply a function or command to all matrix elements in the R programming language.
The table of content looks as follows:
Let’s take a look at some R codes in action.
Introducing Example Data
We use the data below as basement for this R tutorial:
mat <- matrix(1:15, nrow = 5)              # Create example data
mat                                        # Print example data

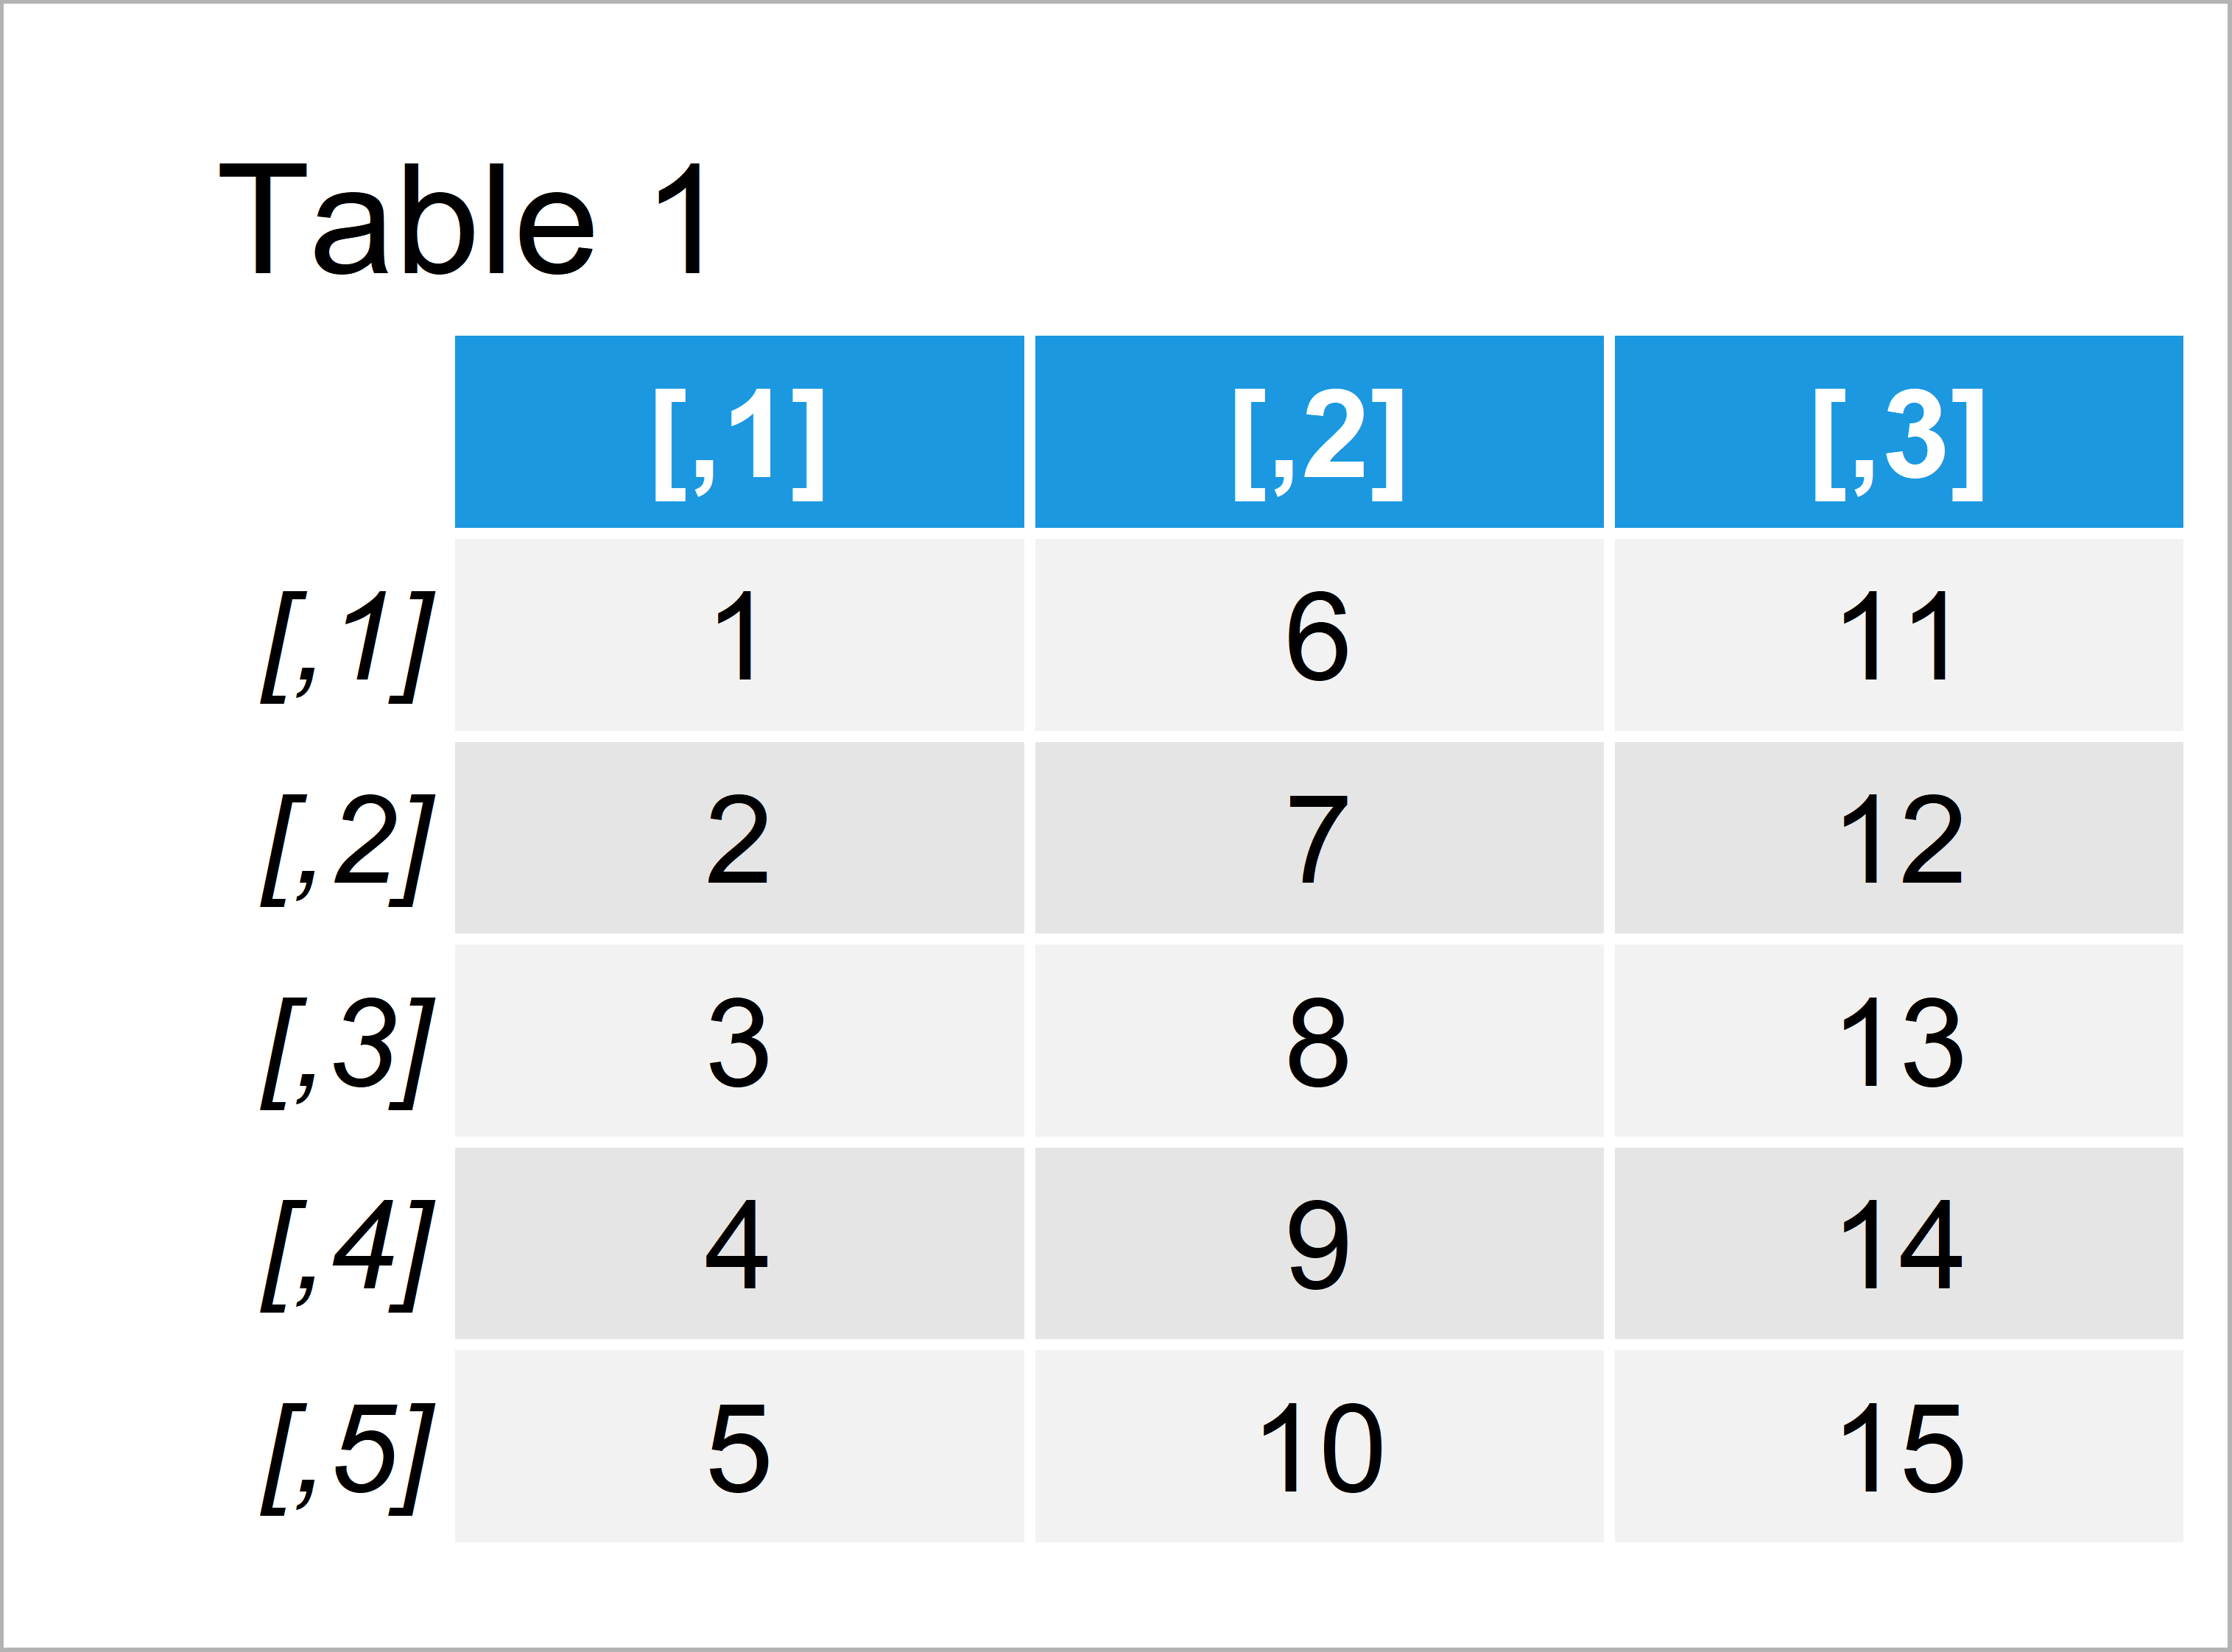
Table 1 shows that our example matrix has five rows and three columns. All elements of our matrix are numeric.
Example 1: Apply Function to Each Element of Matrix
The following R programming code explains how to apply an already existing function to all data points of a matrix in R.
For this task, we simply have to specify the matrix name within the function (i.e. the sqrt function):
mat_new1 <- sqrt(mat)                      # Apply function to each element
mat_new1                                   # Print updated data

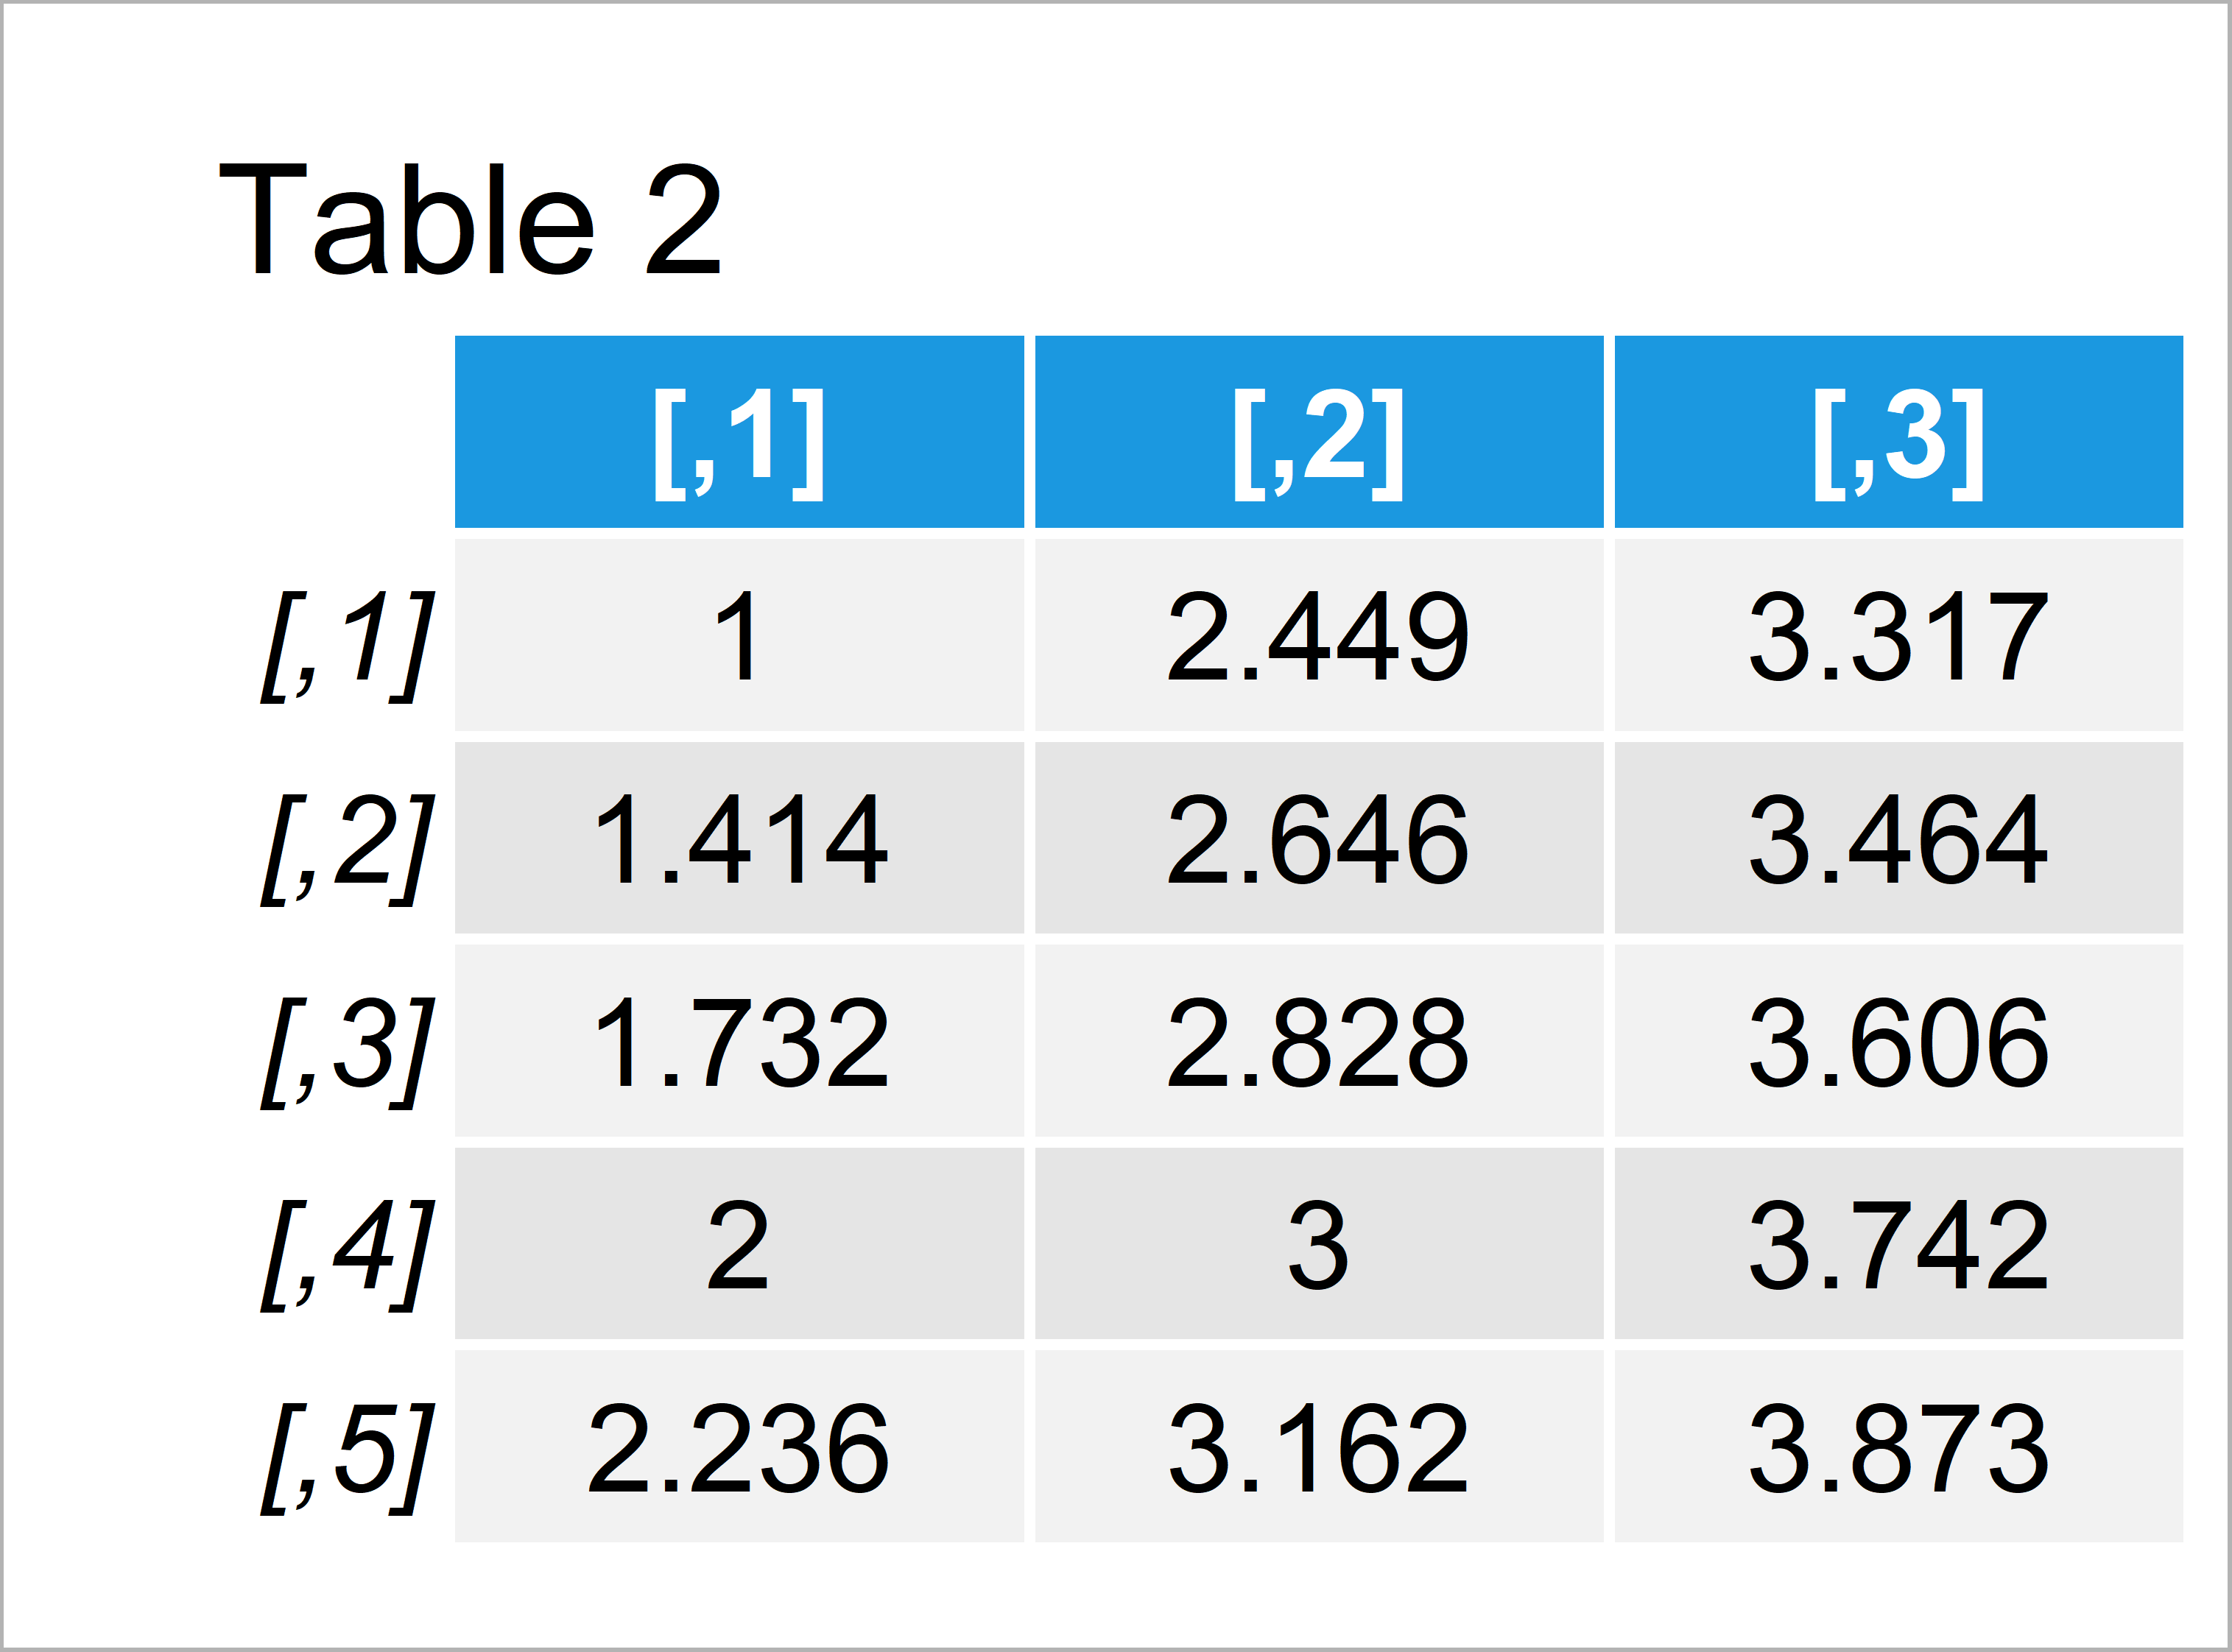
After executing the previous R programming code the matrix shown in Table 2 has been created. As you can see, all elements of our new matrix contain the square root corresponding to the input value.
Example 2: Apply User-Defined Function to Each Element of Matrix
Example 2 illustrates how to apply a manually created function to each element of a matrix.
First, we have to create a user-defined function in R:
my_fun <- function(x) {                    # Create own function
  x * 3 + 10
}
Next, we can use the apply() function to use our user-defined function for each item of our matrix.
Note that we have to use the c() function to specify that we want to apply our function to all row and column indices:
mat_new2 <- apply(mat, c(1, 2), my_fun)    # Apply own function to each element
mat_new2                                   # Print updated data

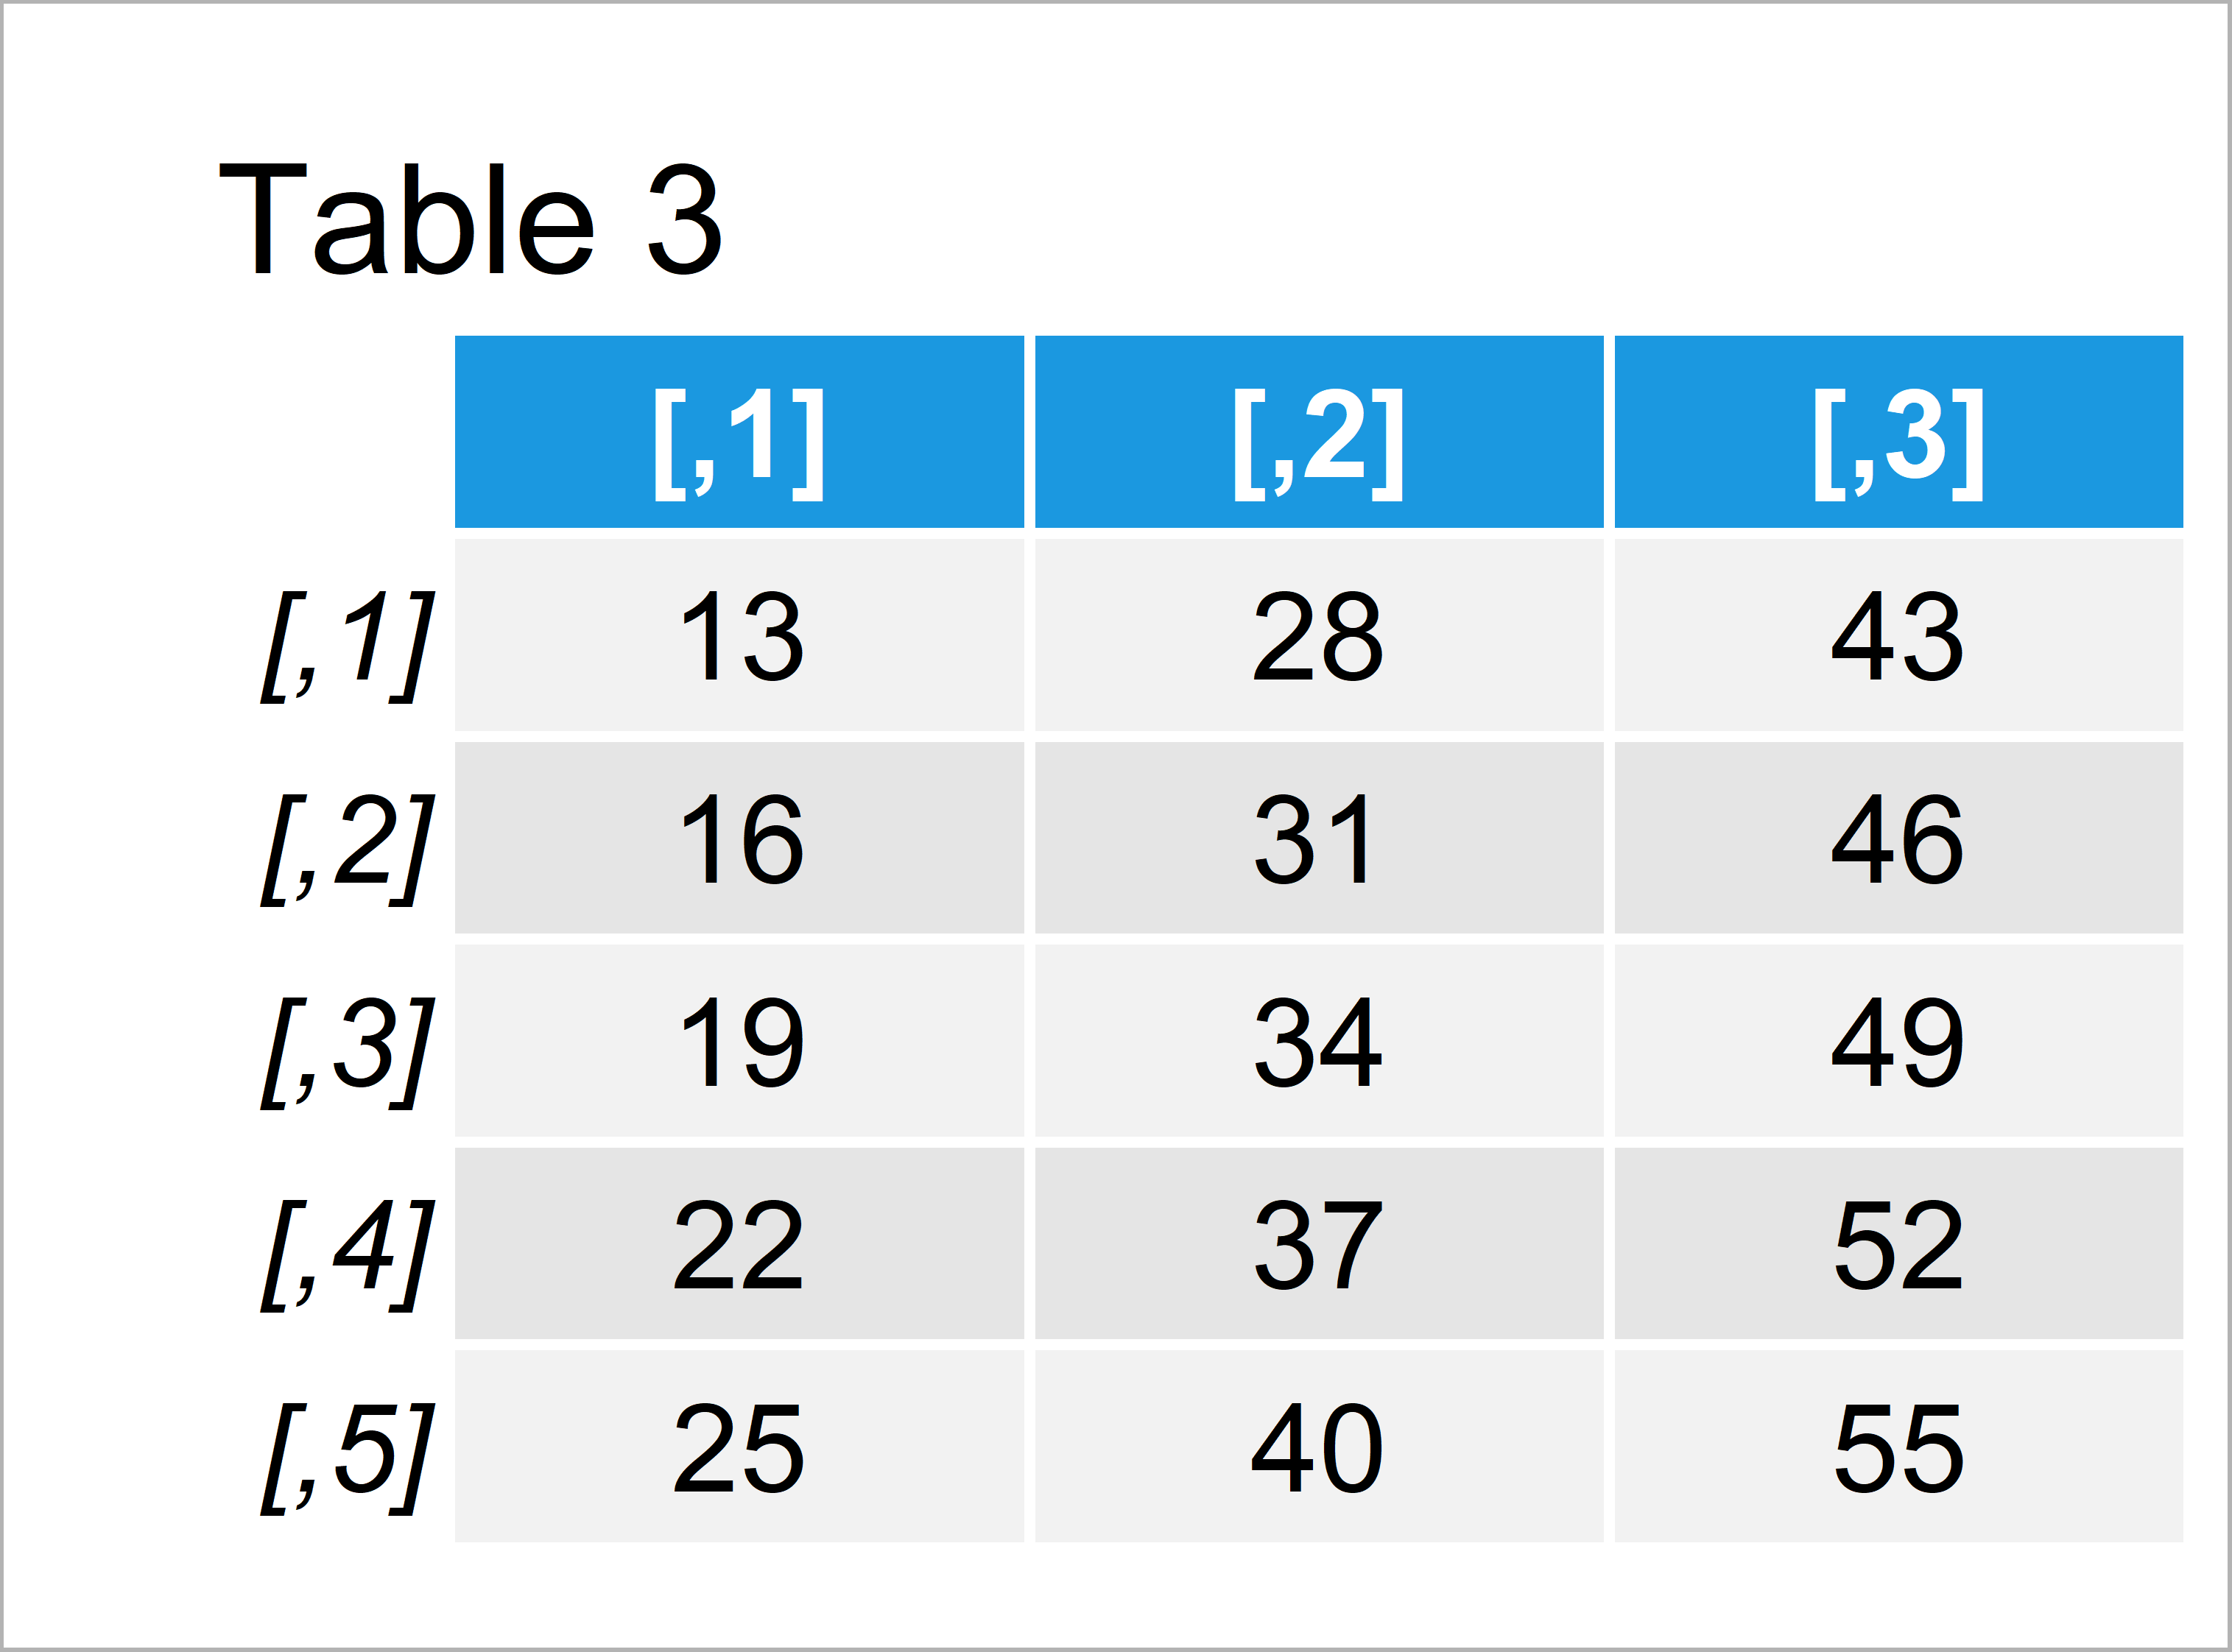
The output of the previous syntax is shown in Table 3 – We have created a new matrix containing the output of each function call of our user-defined function.
Video, Further Resources & Summary
Do you need further info on the R programming code of this tutorial? Then I recommend having a look at the following video of my YouTube channel. In the video, I’m explaining the R codes of this article.
Also, you might want to have a look at the other R tutorials of this website.
Summary: This page has illustrated how to use a function for each element of matrices in the R programming language.
Don’t hesitate to let me know in the comments, in case you have additional questions on how to apply a function over a matrix keeping the same matrix dimensions in R.


