Apply Function to Each Cell of Data Frame in R (2 Examples)
In this article you’ll learn how to apply a user-defined function to each data frame element in the R programming language.
The tutorial consists of the following information:
Let’s dive into it:
Construction of Exemplifying Data
We’ll use the following data as a basement for this R tutorial:
data <- data.frame(x1 = 1:5,                # Create example data
                   x2 = letters[5:1],
                   x3 = 7)
data                                        # Print example data

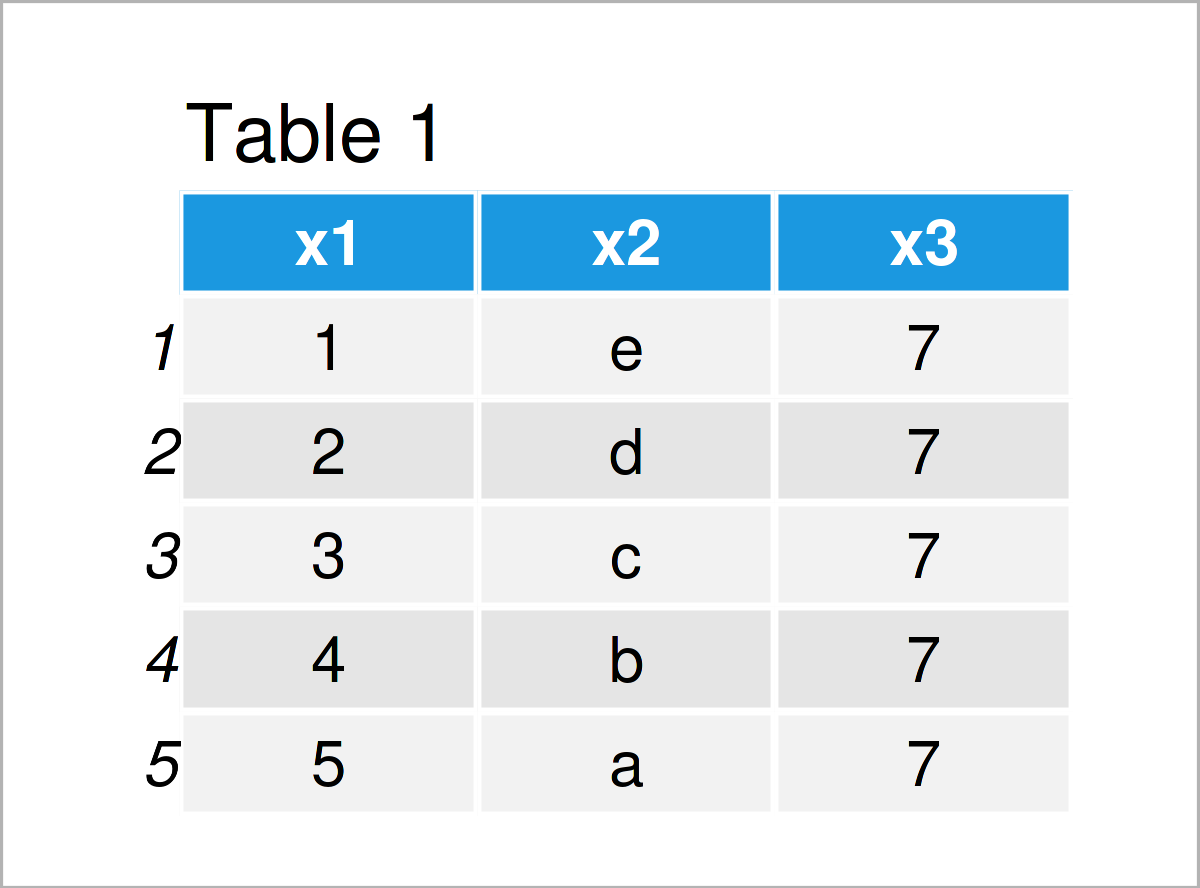
Table 1 shows that the example data consists of five rows and three columns.
Next, let’s create a user-defined function:
my_fun <- function(x) {                     # Create user-defined function
  paste0("out_", x)
}
The previous R code has created a new manually defined function called my_fun. We can apply this function to a single data cell as shown below:
my_fun(data$x1[3])                          # Apply function to one value
# [1] "out_3"
As you can see, our function adds the prefix “out_” to it’s input.
Let’s apply this function to all elements in our example data frame!
Example 1: Apply User-Defined Function to Each Element of Data Frame Using lapply() Function
Example 1 shows how to apply a user-defined function to every cell of a data set using Base R.
For this task, we can use the lapply function as shown below.
Note that we are specifying [] after the name of the data frame. This keeps the structure of our data. If we wouldn’t use this operator, the lapply function would return a list object.
data_new1 <- data                           # Duplicate data frame
data_new1[] <- lapply(data_new1, my_fun)    # Apply function to each element
data_new1                                   # Print updated data frame

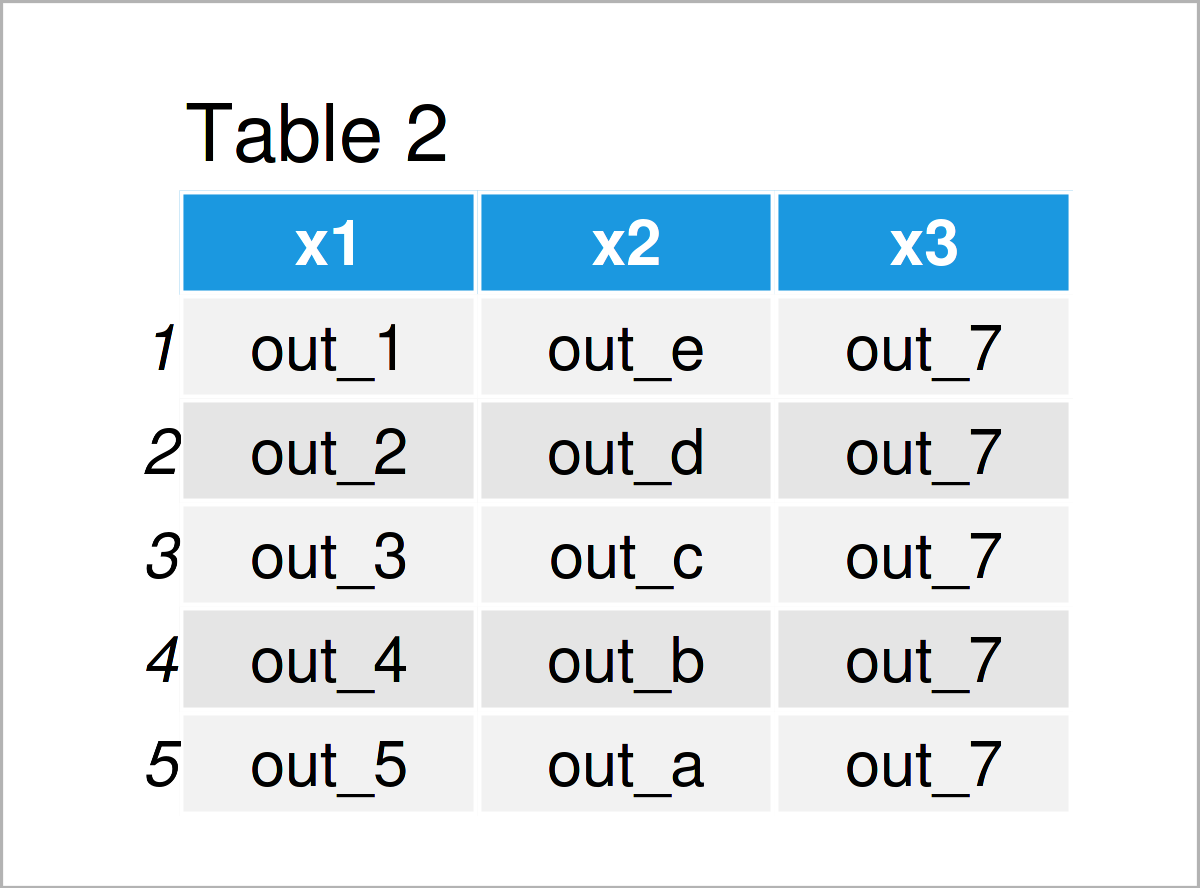
As shown in Table 2, the previous R syntax has created a new data frame called data_new1 where each cell contains the prefix “out_”.
Example 2: Apply User-Defined Function to Each Element of Data Frame Using mutate_all() Function of dplyr Package
This example illustrates how to use the dplyr package instead of Base R to apply a function to each data cell.
We first need to install and load the dplyr package, in order to use the corresponding functions:
install.packages("dplyr")                   # Install & load dplyr
library("dplyr")
Next, we can apply the mutate_all function to use our function for each data cell:
data_new2 <- data %>%                       # Apply function to each element
  mutate_all(my_fun)
data_new2                                   # Print updated data frame

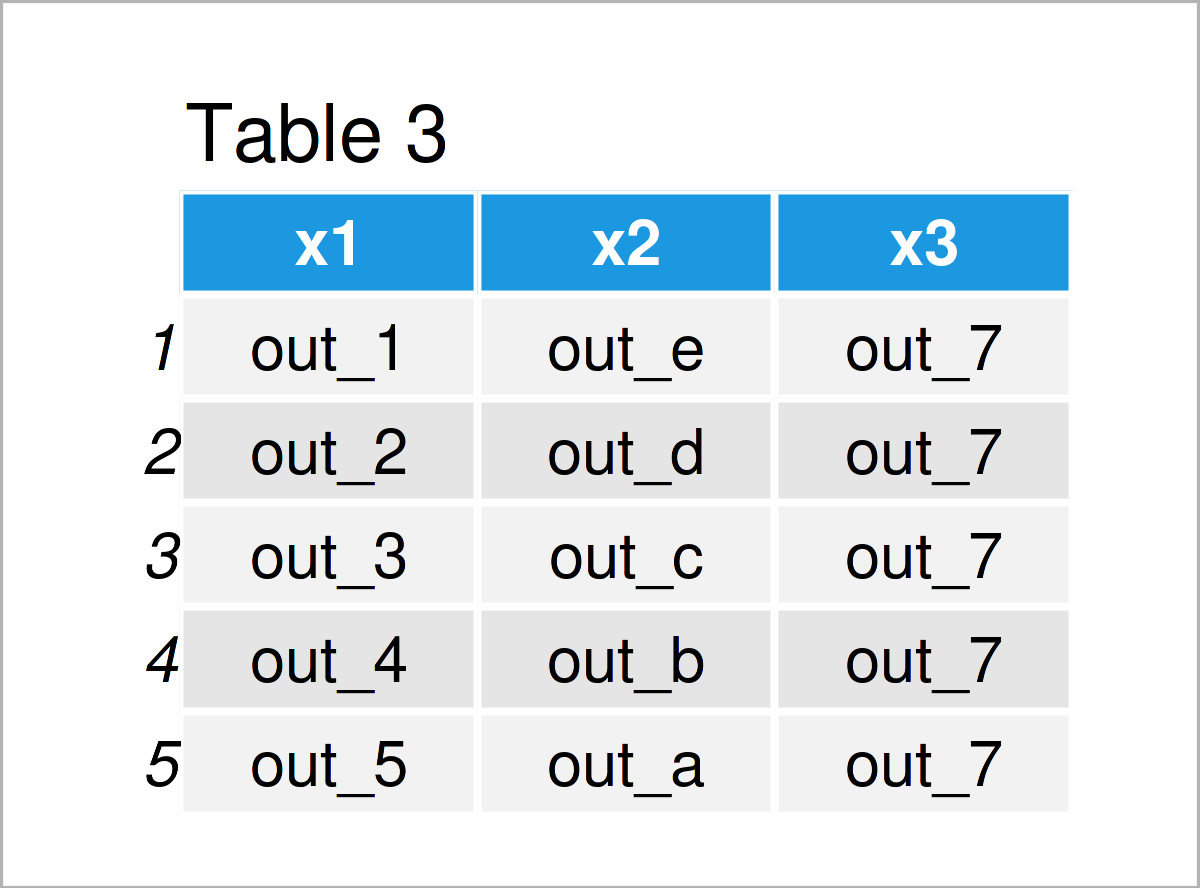
Table 3 shows the output of the previous syntax: The same data frame that we have already created in Example 2.
Video, Further Resources & Summary
Do you want to know more about the application of a user-defined function to each data frame element? Then you might want to have a look at the following video on my YouTube channel. In the video, I explain the R programming syntax of this page.
Besides the video, you might read the other articles on this website:
- Apply a Function to Each Element of a Matrix
- Apply Function to Each List Element in R
- Read All Files in Directory & Apply Function to Each Data Frame
- Plot All Columns of Data Frame in R
- Select First Row of Each Group in Data Frame
- List of R Functions
- R Programming Tutorials
Summary: In this R tutorial you have learned how to apply a user-defined function to each data frame cell. Please tell me about it in the comments section below, in case you have any further comments and/or questions.


