How to cbind & rbind Vectors with Different Length in R (2 Examples)
In this article, I’ll show how to merge multiple vector objects with different length in R programming.
The page will contain two examples for the merging of data. More precisely, the page consists of this information:
Let’s take a look at some R codes in action!
Creation of Example Data
The data below will be used as basement for this R programming tutorial.
vec1 <- 1:6                                         # Create first example vector
names(vec1) <- letters[1:6]
vec1                                                # Print first example vector
# a b c d e f
# 1 2 3 4 5 6
Have a look at the previous output of the RStudio console. It shows that our first example data object is a named vector with a length of six.
Let’s create a second vector object in R:
vec2 <- 1:4                                         # Create second example vector
names(vec2) <- letters[1:4]
vec2                                                # Print second example vector
# a b c d
# 1 2 3 4
Our second example vector contains four named vector elements.
Example 1: Column-Bind Vectors with Different Length Using cbind.na() Function of qpcR Package
In Example 1, I’ll show how to combine two vector objects with different length as columns using the qpcR package.
To be able to use the functions of the qpcR package, we first need to install and load qpcR:
install.packages("qpcR")                            # Install qpcR package
library("qpcR")                                     # Load qpcR package
Next, we can apply the cbind.na function of the qpcR package to combine our two vectors to a matrix:
data_cbind <- qpcR:::cbind.na(vec1, vec2)           # Bind as columns
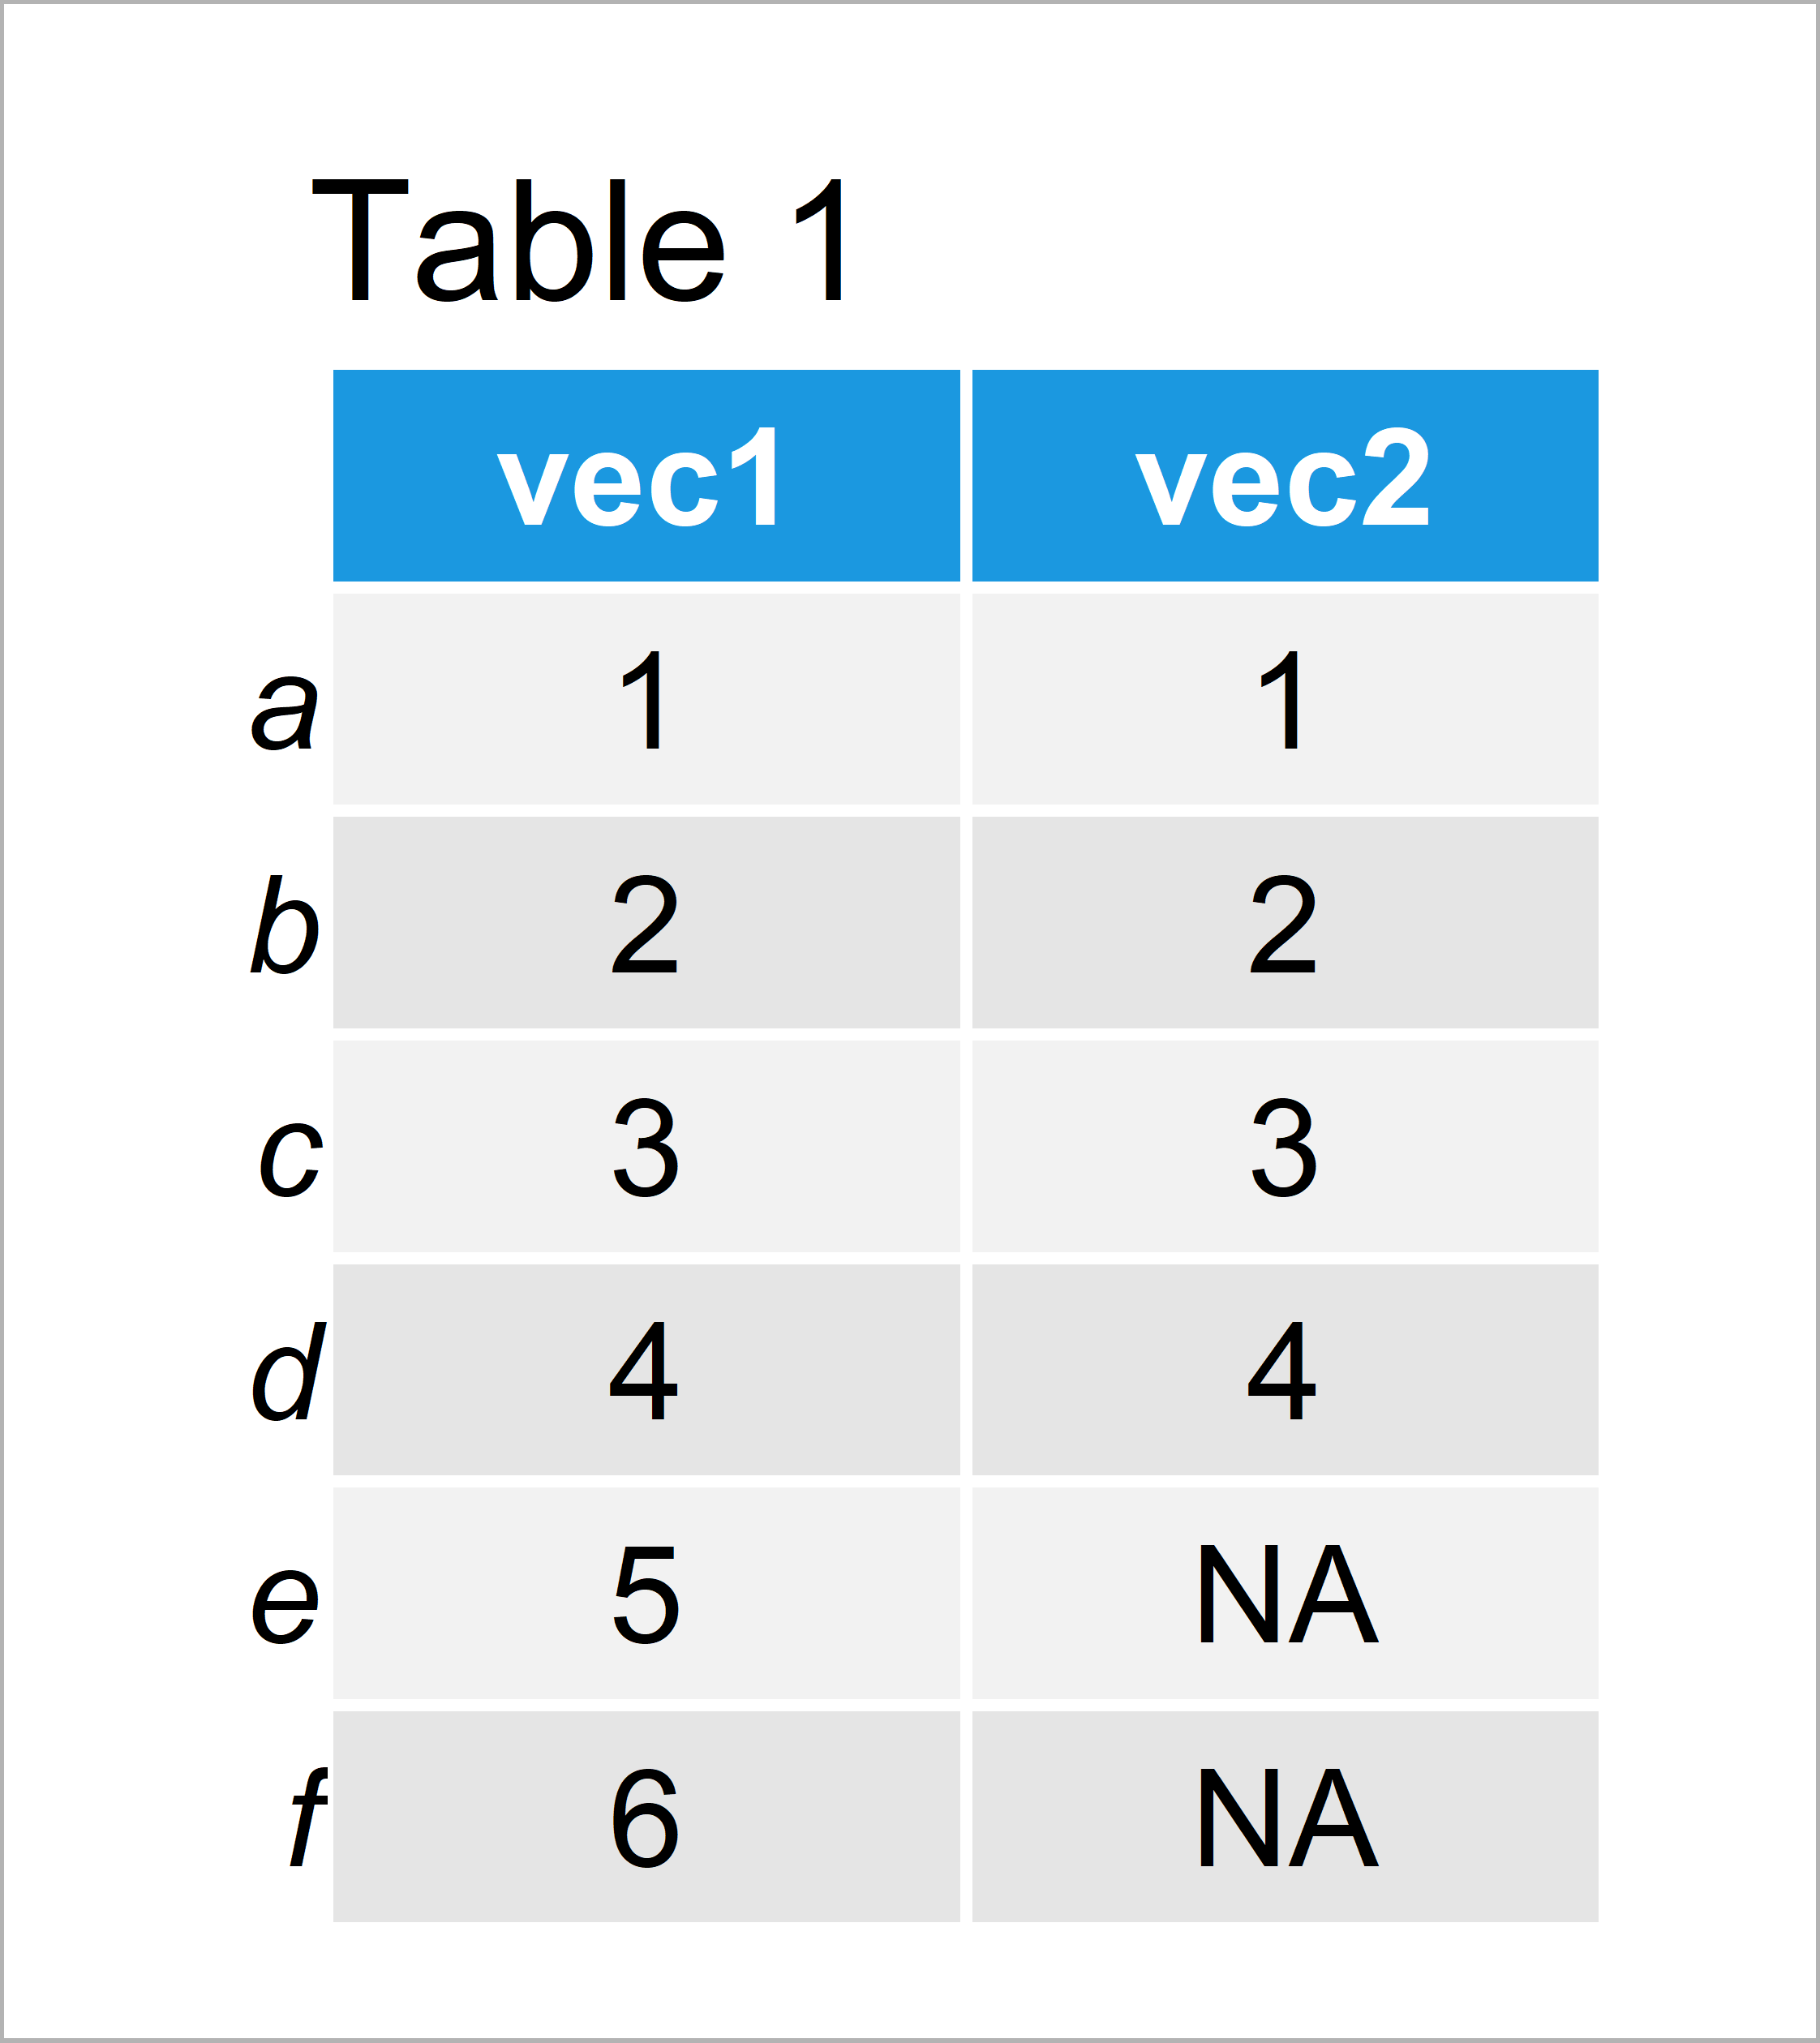
data_cbind                                          # Print combined data

Have a look at table 1: It shows that the cbind.na function inserted NA values at the end of the shorter vector.
Example 2: Row-Bind Vectors with Different Length Using bind_rows() Function of dplyr Package
In this example, I’ll explain how to bind two vectors with different length by rows using the dplyr package.
To be able to use the functions of the dplyr package, we first have to install and load dplyr:
install.packages("dplyr")                           # Install & load dplyr
library("dplyr")
Now, we can use the bind_rows function to merge our two vectors by rows:
data_rbind <- as.data.frame(bind_rows(vec1, vec2))  # Bind as rows
data_rbind                                          # Print combined data

In Table 2 you can see that we have constructed a data frame with two rows using the previously shown R programming code. The shorter vector was set to NA in the later columns.
Note that I have also used the as.data.frame function to create a data frame instead of a tibble. You may remove the as.data.frame function from the previous code in case you prefer to work with tibbles.
Video, Further Resources & Summary
Do you need more info on the R codes of this tutorial? Then you may watch the following video that I have published on my YouTube channel. In the video, I illustrate the R programming code of this page in RStudio.
Besides the video, you may want to read the other articles on this homepage. A selection of interesting articles about merging and joining data can be found below:
Summary: You have learned in this article how to join data objects with different length in the R programming language. In case you have further questions, let me know in the comments section. Furthermore, don’t forget to subscribe to my email newsletter to receive updates on the newest tutorials.


2 Comments. Leave new
Content really good and straight forward. Your commands were the only ones that I’ve tried and it worked. Thank you!!
Thank you very much for this wonderful feedback Gabrielle! Glad to hear that my tutorial was helpful to you!
Regards,
Joachim